
Game Engines
Unity | Unreal Engine | Godot
3D Modeling Tools
Autodesk Maya | Substance 3D Painter
Development Tools
VS Code | Git | OpenGL | Jira | Microsoft Office | MobaXterm
Programming Languages
C | C++ | C# | Python | JavaScript | HTML5 | CSS | Lua
About Me
Hello! My name is Andrew, and I am a student at the Rochester Institute of Technology pursuing my Master's degree in Game Design & Development. This page is a place for me to show off my personal projects and academic work!I am looking for work as a Software Engineer or Developer in a game development environment or related field, if you would like to ask me about my work or a job opportunity, feel free to reach out to me at [email protected]!
My Best Work
Mighty Mouth Quest
Unity | C#
Dig Too Deep
C# | Unity | Prototype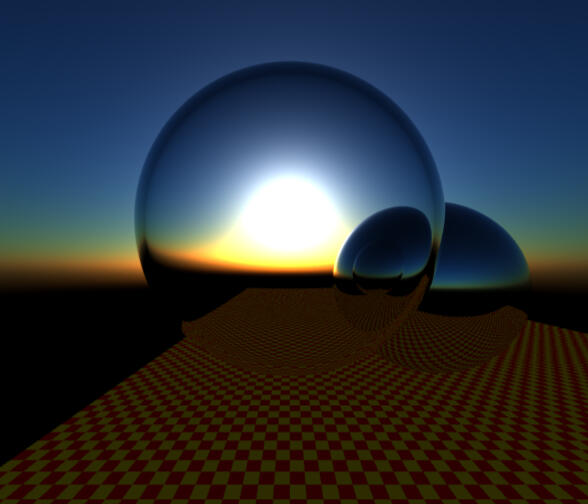
The Raytracer
C++ | Global Illumination
My Best Work
These are the projects I have been working on most recently, and the most proud of!

Mighty Mouth Quest
Unity | C#
Dig Too Deep
C# | Unity | Prototype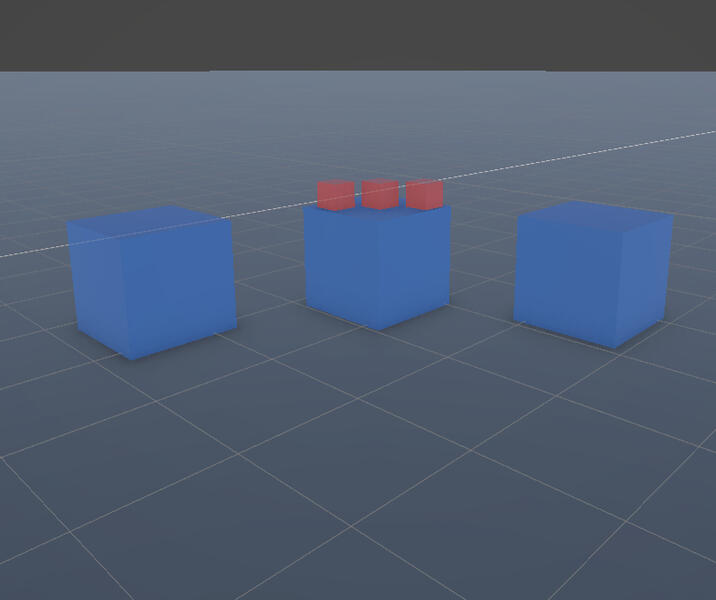
Interaction System
Demo | Unity | C#
The Raytracer
C++ | Global Illumination
Video Games
These are the largest projects I have spent the most of my time on where I worked primarily as a developer and systems programmer! All of these projects were developed in 2-3 week sprints in AGILE environments over the course of several months.

Mighty Mouth Quest
Unity | C#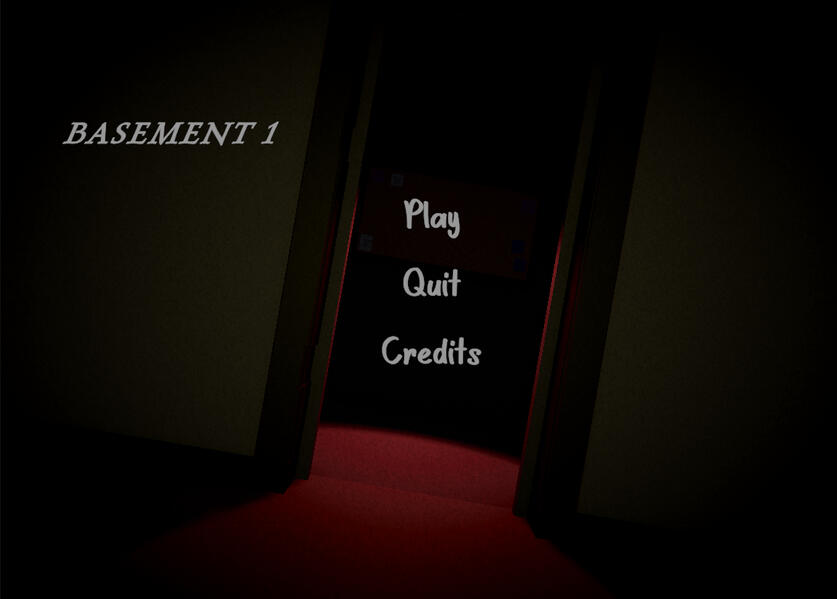
Basement One
Unity | C# | A*
Game Jams and Prototypes
This is a general collection of all the game jam projects I have worked in, and smaller prototypes I used to try out something new. Each are quite small, but gave me the opportunity to research and learn in a short amount of time!

Dig Too Deep
C# | Unity | Prototype
Connect'In
Wolfjam 2024 2nd Place Winner | Game Jam | Unity
Golf Grubs
Unity | C# | Prototype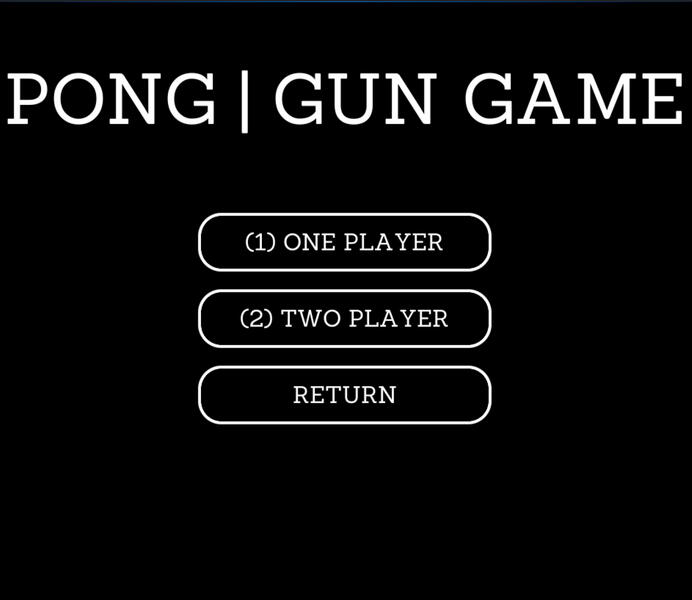
Pong ++
Blueprints | Unreal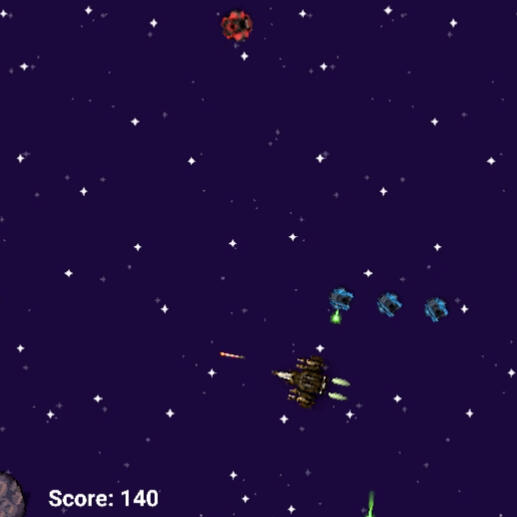
SHMUP
Unity | C# | Solo Project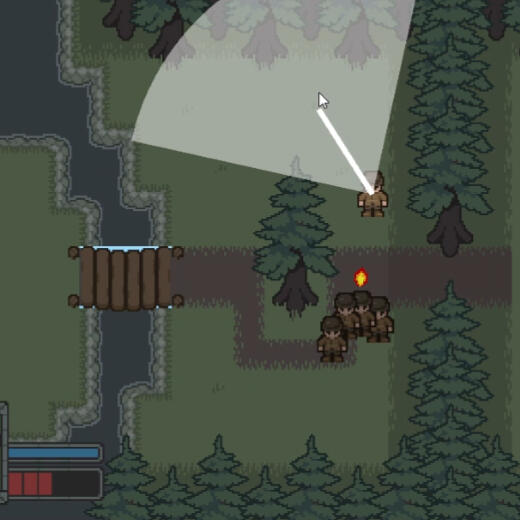
Scouts
A* | Game Jam | Unity | C#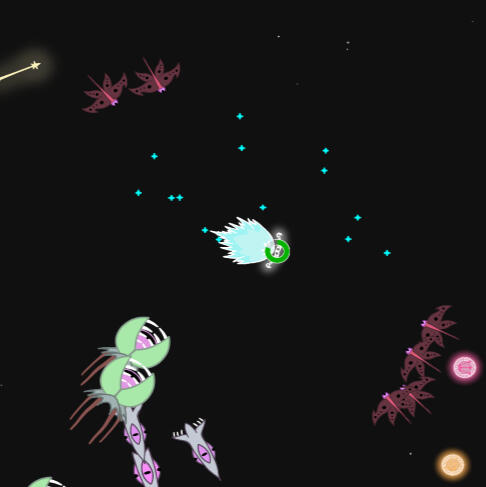
BOWNUS
Game Jam | Godot | C#
The Eternal Crown
2D | C# | Monogame

Demos, Systems, and Museums
Individual systems that I have built over the years that I am particularly proud of, and feel that which deserve their own showcase!
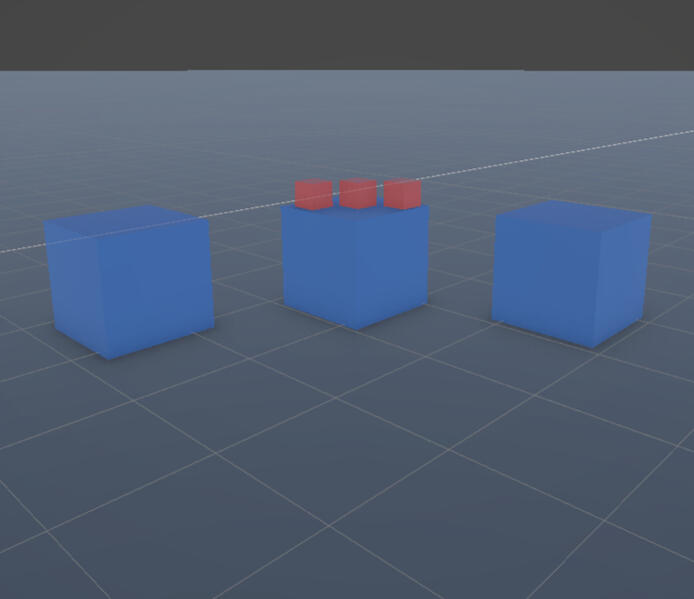
Interaction System
Demo | Unity | C#
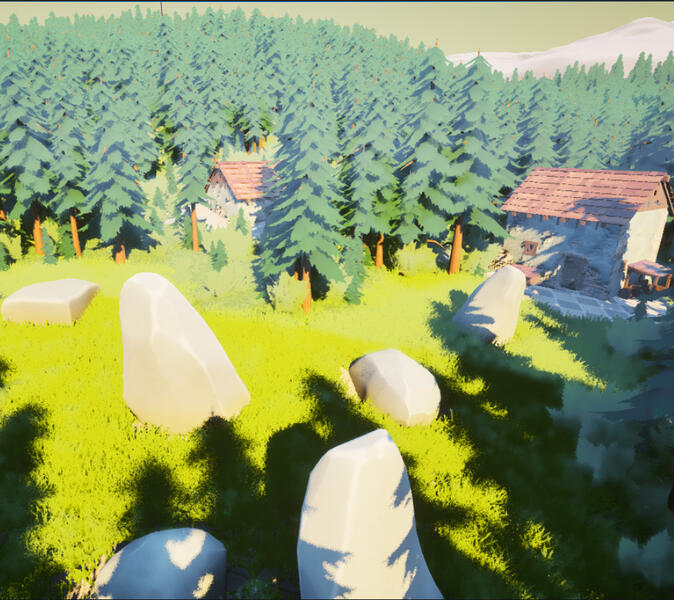
PCG Graph Forest
Unreal Engine | PCG Graphs | Tech Demo
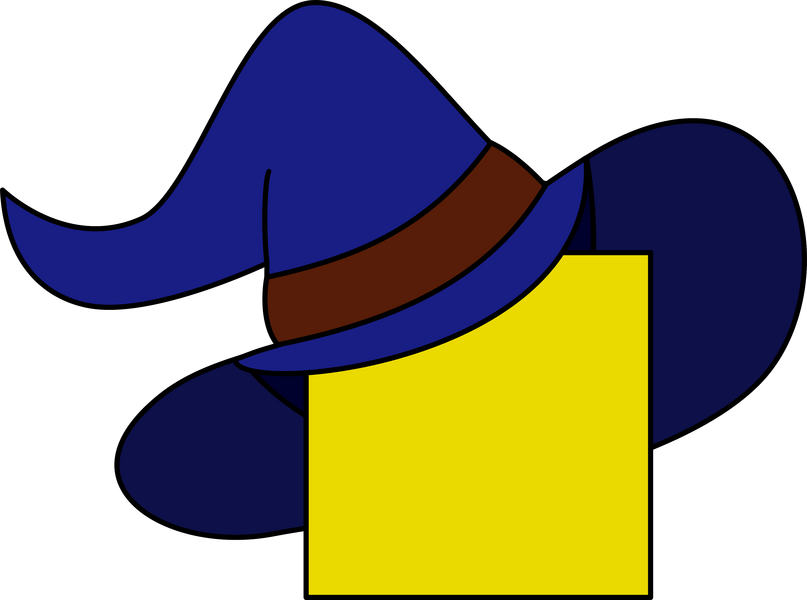
Wizard Cube
Personal | Tech Demo | Godot
Everything Else!
A career in game design is multidisciplinary; I have worked in production, design, 3D art, not-games, and many other roles that I have not necessarily specialized in! Having the skills and knowledge from these projects gives me a better picture of the production pipeline as a whole, allowing me to communicate broad ideas and concepts across many different teams and skillsets.

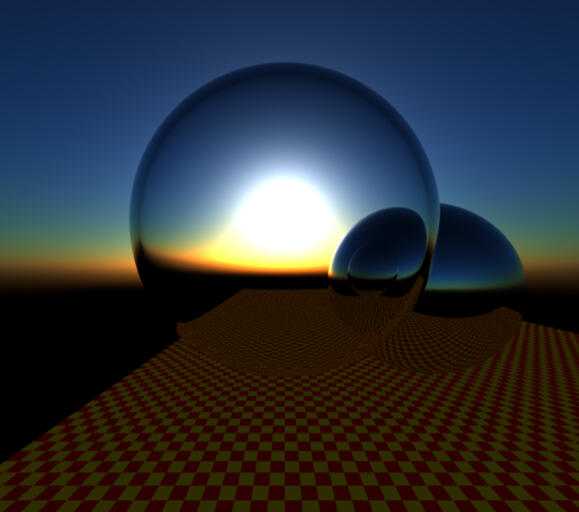
The Raytracer
C++ | Global Illumination
3D Modeling and Animation
Maya | Substance 3D Painter
Mech Attack
Design | Playtesting
3D Renderer
Python
Pong ++
Recreating old arcade games in a new engine is a great way to quickly learn the ropes! It keeps the scope of the project small enough to not overextend yourself, and all of the mechanics you want to implement have already been designed for you.
Overview
My introduction to using Unreal Engine was to recreate the classic arcade game Pong with a twist - players would move between paddles with different abilities every time they scored a goal against their opponent.
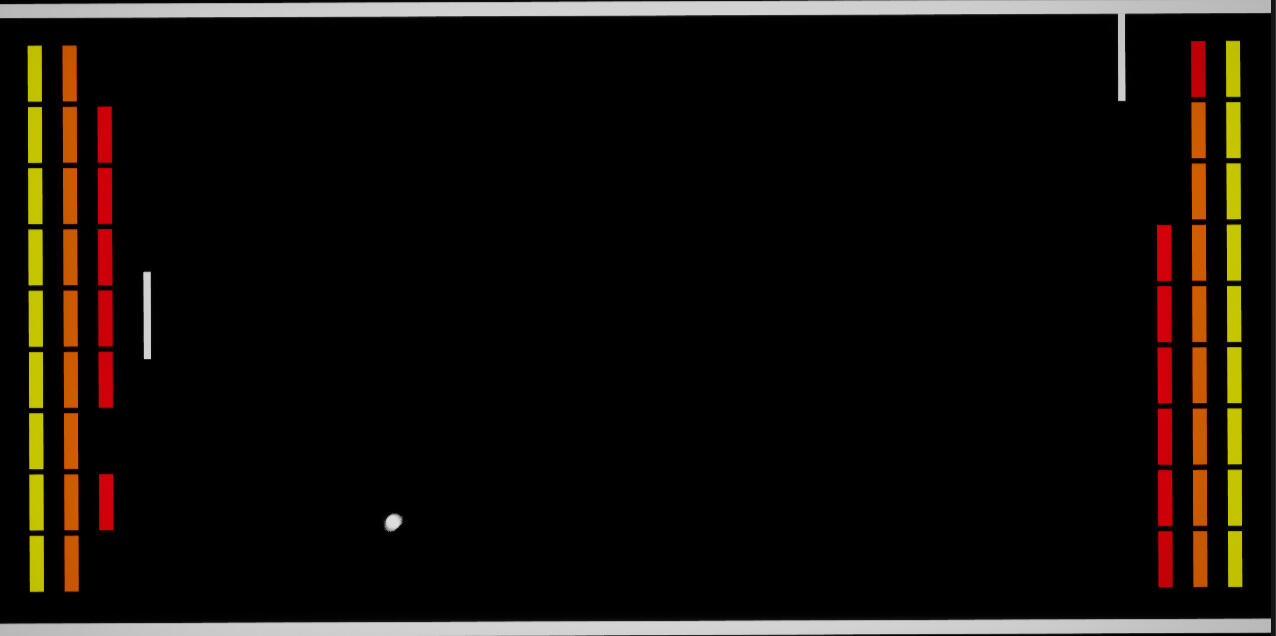
With some extra time, and since we already had functional paddle and ball mechanics, we also added a second game mode recreating the game Breakout using the same tools.
Personal Work
Different Paddle Types: As the player scored a goal, they would swap to a different paddle type. I created each variant's unique abilities, and the system to give control of the new paddle to its player.
Game Mode Managers: I created the functionality to progress and complete each game mode. The manager for Pong swaps between different paddles, and enters the win state when a player scores a goal with the final paddle. In Breakout, players must destroy the blocks on the opposite screen in order to score an actual goal.
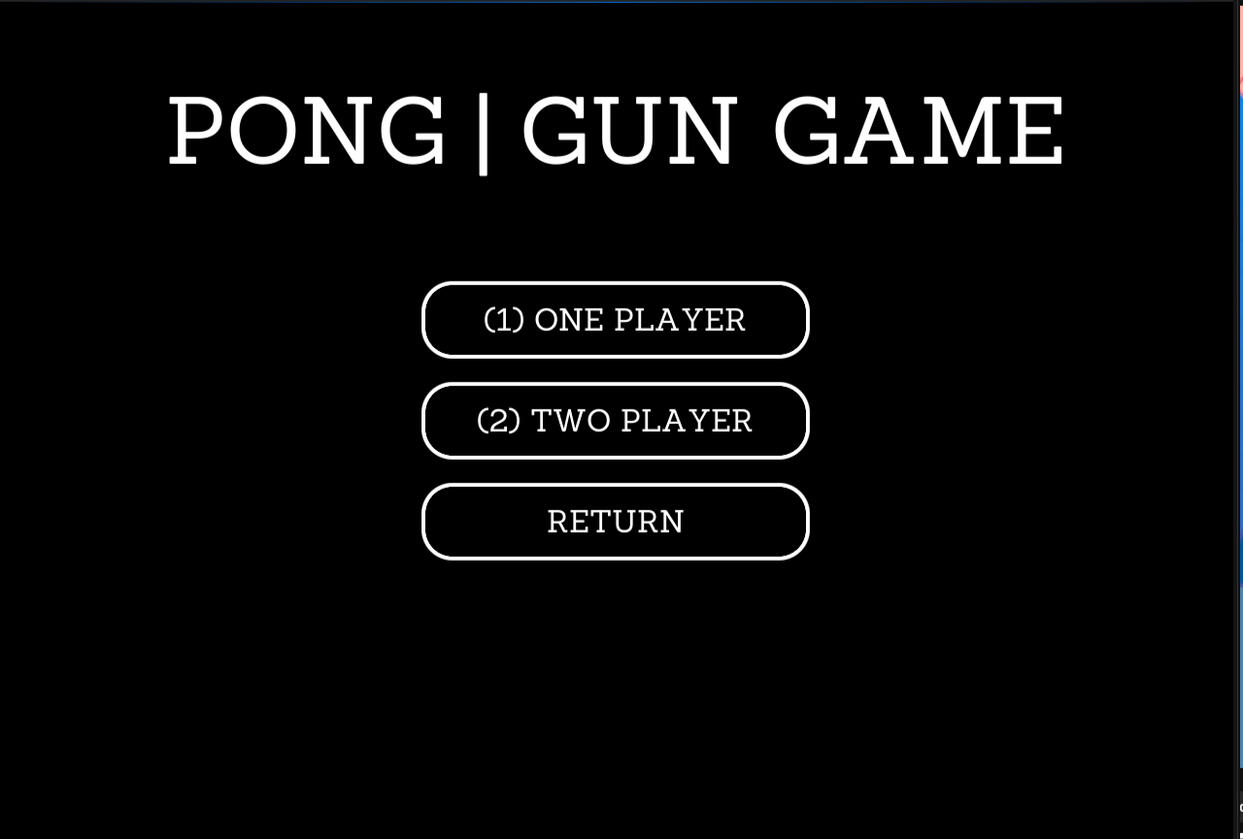
Menu Screens: I created the different menu options and navigation to start each level.
Genre: 2D Arcade Game, Clone
Team Size: 2 Developers
Duration: 3 Weeks
Tools: Blueprints | Github
Standard Gameplay

Breakout Clone

Gun Game Menu
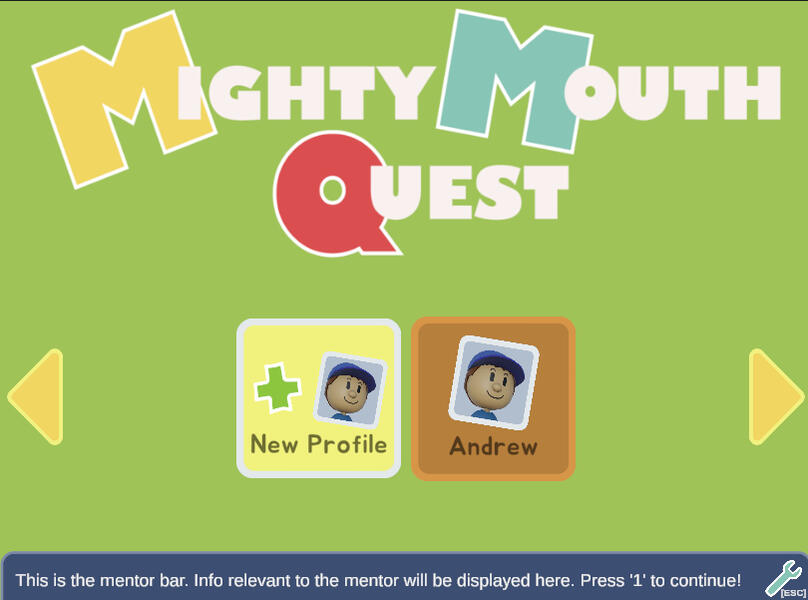
Mighty Mouth Quest
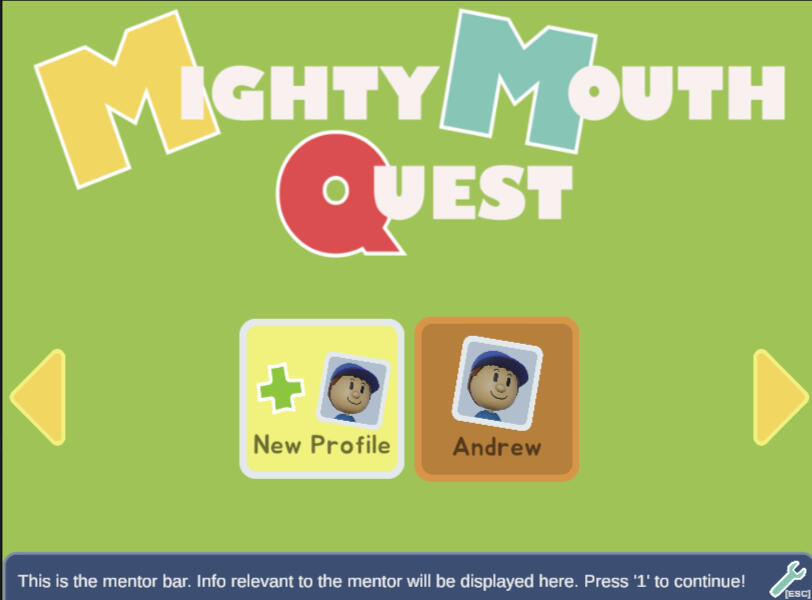
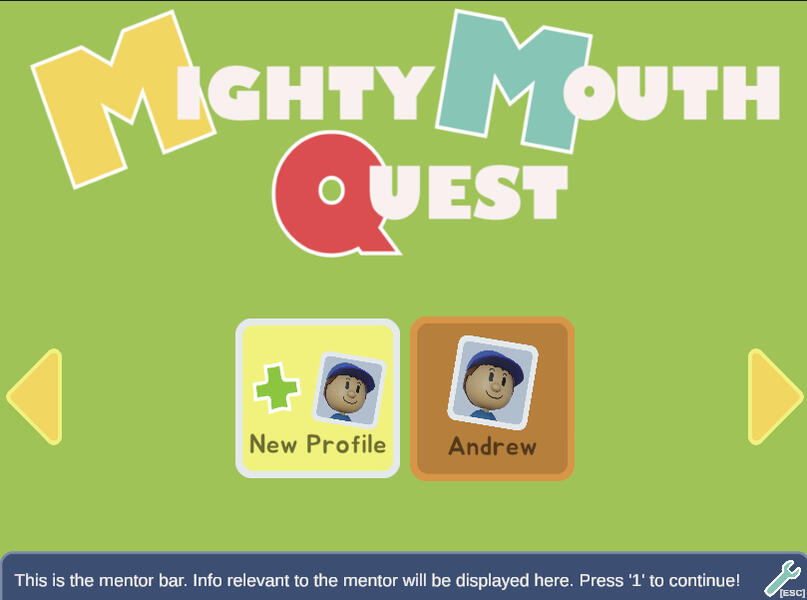
MMQ is a game designed to help psychologists build confidence in kids diagnosed with selective mutism. Accompanied by a real world mentor to proctor the experience, players can earn QuestCash by verbally responding to NPCs in the game. By providing a safe space with low stakes and lots of small incremental rewards, children can learn to find their voices through play!
Overview
I worked as a systems developer on the MMQ project towards the end of its second year. At that point it had been handled by five other teams, and the overall structure was a mess, dozens of unused scripts and scenes sat unused, and there was little reusability across each level of gameplay.
Personal Work
I started with organizing and taking stock of the state of the project for our team so that we could plan how to move forward. Once we had a better understanding of where the project was at, I worked on the following systems;
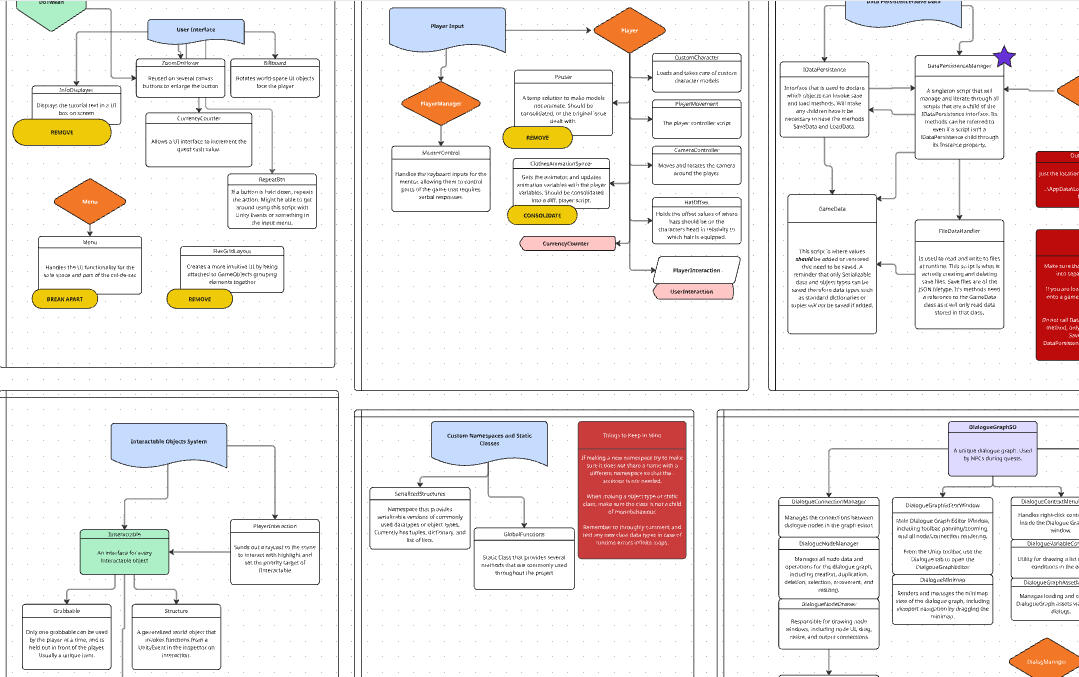
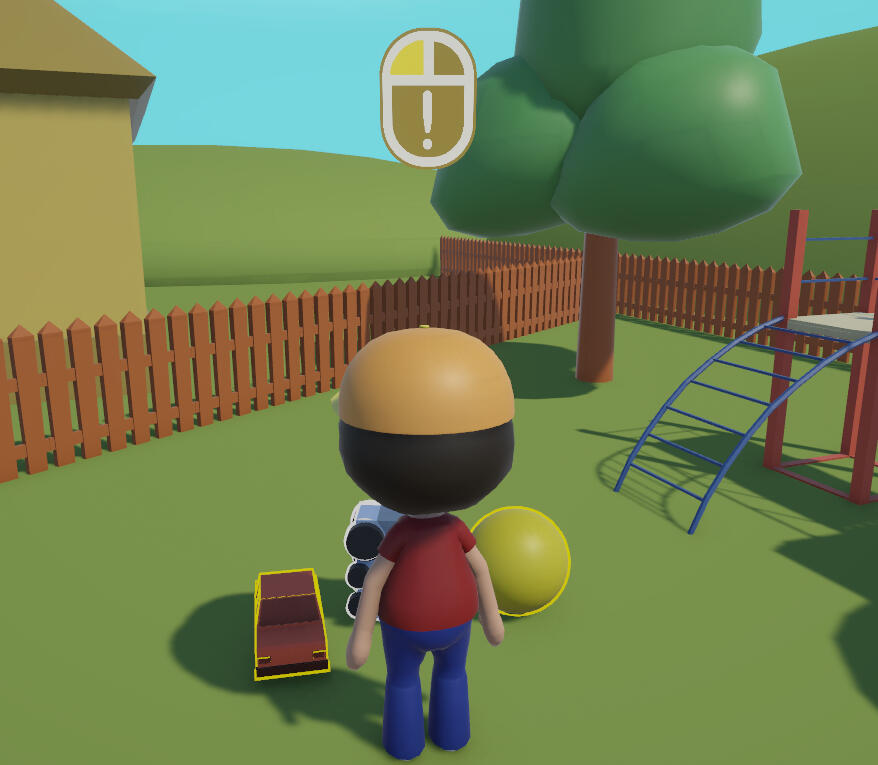
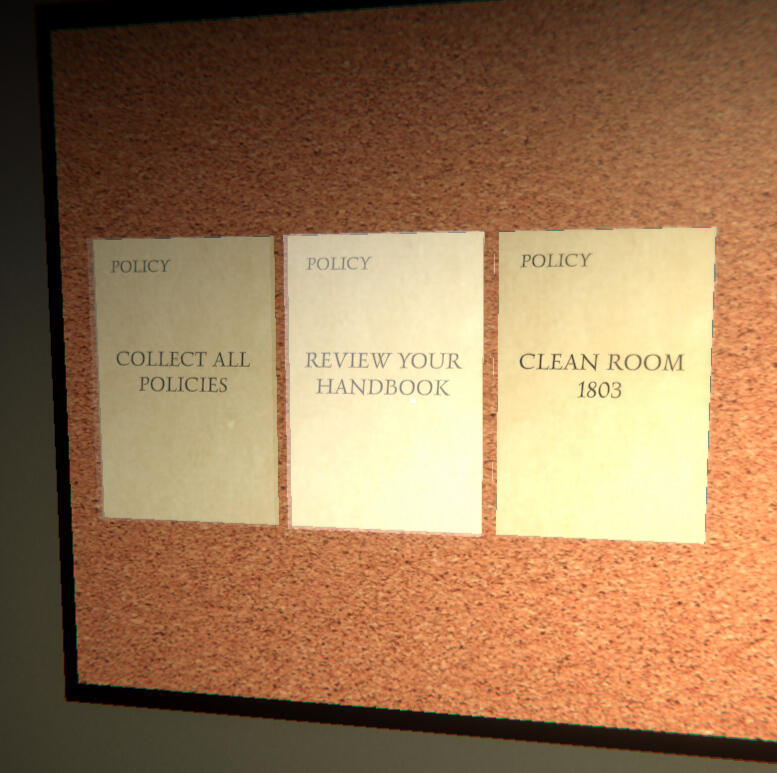
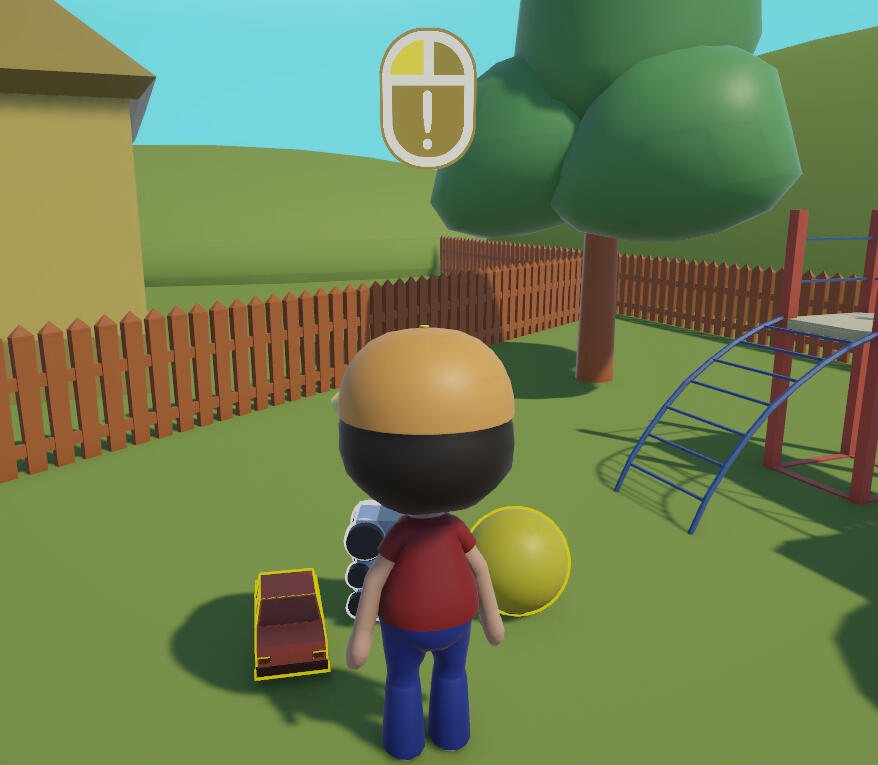
Interaction System: The player needed to interact with dozens of different items and objects found in the world, but relied on unique distance checks for each instance. I replaced this with a unified interaction system, that stores a single Target item, preventing any overlapping interactions from taking place. Objects in range of the player are highlighted in yellow, and the priority Target is highlighted in white.
The Mentor Bar: The game's tutorial was originally displayed to a text box at the bottom of the screen on a timer, not waiting for the player to react or confirm that they had understood. I replaced this with a designer friendly tool that relied on user-input to progress. Tutorials could now be created entirely by our designers though a menu in Unity without needing to edit the script itself.
Quest Manager: Quests had been folded into the game's dialogue manager, and important variables were named across several different scripts. All of this was consolidated into a single QuestManager, which again made creating new quests entirely accessible through a menu in Unity, and not through a script.
Problems and Solutions
It was part way through the first sprint that we had fully assessed the level of disorganization that the project was currently in. As a team, our mission became getting the project into a development ready state for the next team, so from the beginning they would be able to produce content at scale without constantly needing to fix core systems like we were now doing.
Genre: 3rd Person Educational Game
Team Size: 12 Developers
Duration: 4 Months
Tools: C# | Miro | Github
Standard Gameplay

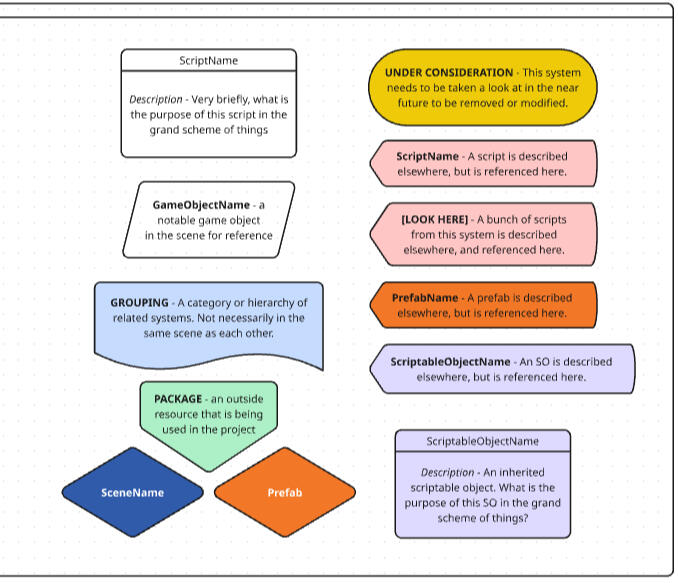
Systems Legend

View of the Systems Map

The Mentor Bar

Interacting with Several Objects
Interaction System
I originally built this system during the first semester of my Master's degree program. I needed a unified system to identify objects in the scene that the player can interact with, but still keep each object's behavior to be undefined. It has proven a handy tool, so I have been continuing to improve it and use it again in my Unity projects!
Overview
A significant percentage of games allow players to interact with objects in a world; doors, buttons, items you pick up off the ground, NPCs - the list goes on! With my system in the Unity engine, you only need two scripts to add this to your game.
IInteractable.cs
Every interactable object must inherit from the IInteractable interface. This identifies the object as something we can interact with to the UserInteraction script, and allows us to customize that behavior to each unique object.
UserInteraction.cs
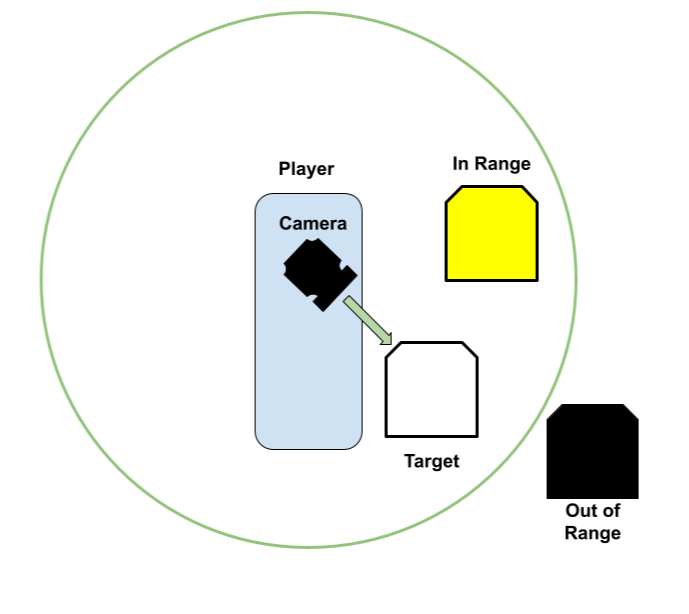
This script is usually attached directly to the player character or camera object, which has a large boundary collider. Objects that enter within this boundary are considered within range to be interacted with, and are highlighted. Each frame, we send out a raycast into the scene in the direction the player is looking, and if it finds an interactable object that is also within range, that object becomes our primary target.
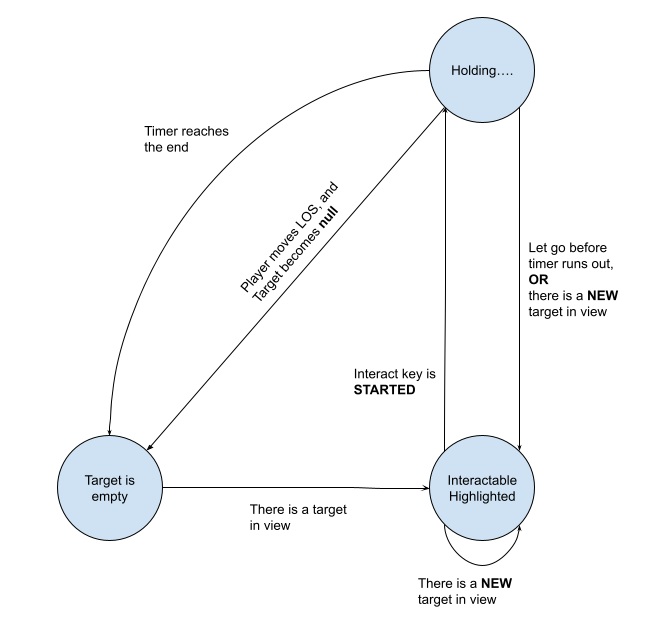
We also handle the option to press-and-hold an interactable object to enable its behavior. If players hold down the button to interact, it will start a countdown for that behavior. If the player ever looks away or lets go, the behavior is dismissed.
Now, if the player presses a button to interact with an object in the scene, there is only ever one valid target. This unified process removes the possibility of multiple unintentional interactions, and the need for excessive distance checks.

Determining the target of the interaction

Interacton FSM
Genre: Unity Tool
Tools: C# | Unity
Implmented in Games

Basement One
Mighty Mouth Quest
Museum Demonstration
Interacting with Objects in the scene
Precision! Easy to select which object to interact with
Buttons can be pressed and held to interact!
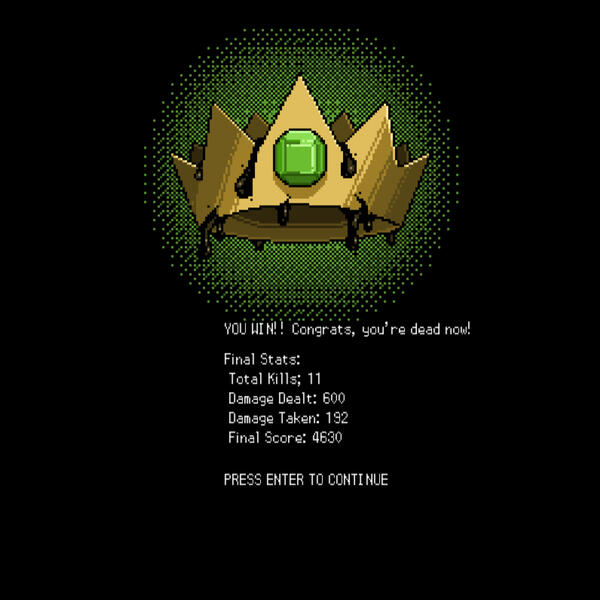
The Eternal Crown
A top-down dungeon crawler pitting the player against randomly encountered monsters within a labyrinthine dark forest. Encountering one of these ghouls thrusts you into turn-based combat! The Eternal Crown lies at the center of the maze where it waits for its next champion to claim it!
Overview
The Eternal Crown was created during my first year at college, and was my first time working alongside a dedicated team on a video game. Much of our focus was spent on learning to work together over the course of a semester, and keeping our plans well documented for each other's use. For this reason development was made through a barebones easy to pick up game engine called Monogame.I designed the turn based combat encounters — a system that allows the player to choose between fleeing, fighting, or healing using potions. While part of this process was reigning back some of our over-scoped mechanics, it meant that I had designed the game to account for additional enemy types to be added at a future date. Consequently, it has become a good habit of mine to design new mechanics with the expectation that they will expanded upon for any of my projects, a trait that has avoided more than a few headaches on my part!
Genre: 2D Turn-based Dungeon Crawler
Team Size: 5 Developers
Duration: 4 Months
Tools: C# | Trello | Github | Monogame
Standard Gameplay
PCG Forest
It will be easy, they said. We should add procedural generation to our game they said.
Overview
I had been hearing the siren song of procedural generation for a while when I decided to work on this project. It is a massive commitment to add to any game that balloons out the scope of every system it comes into contact with, but I still wanted the technical experience to be able to work on this type of system in the future. This tech demo explores the use of PCG graphs from Unreal Engine to make a custom forest environment.
The Work
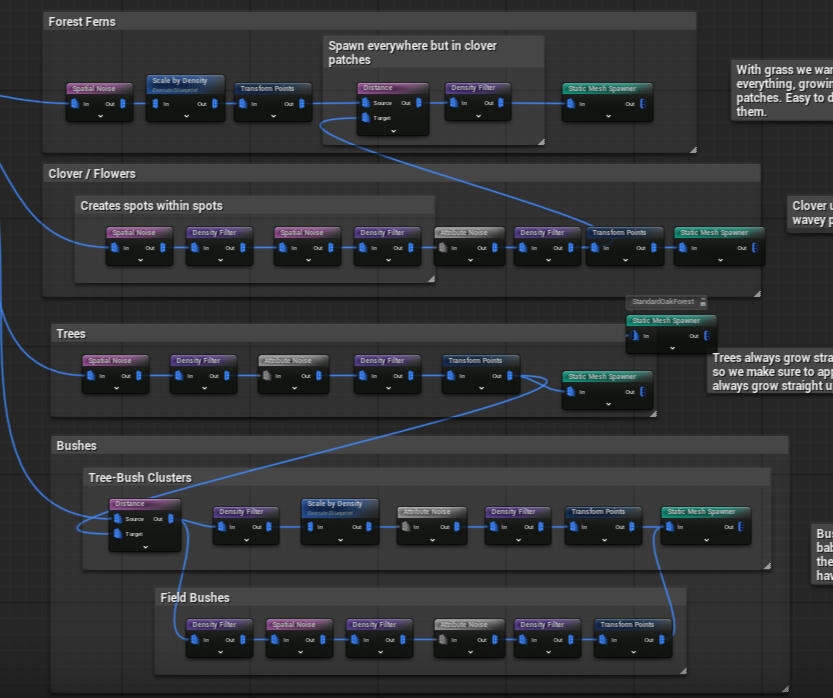
A pattern to working with PCG graphs appeared almost immediately - after reading in the landscape data from a part of the world, you would place the scenery and then feed that position data into the next 'layer' of scenery.
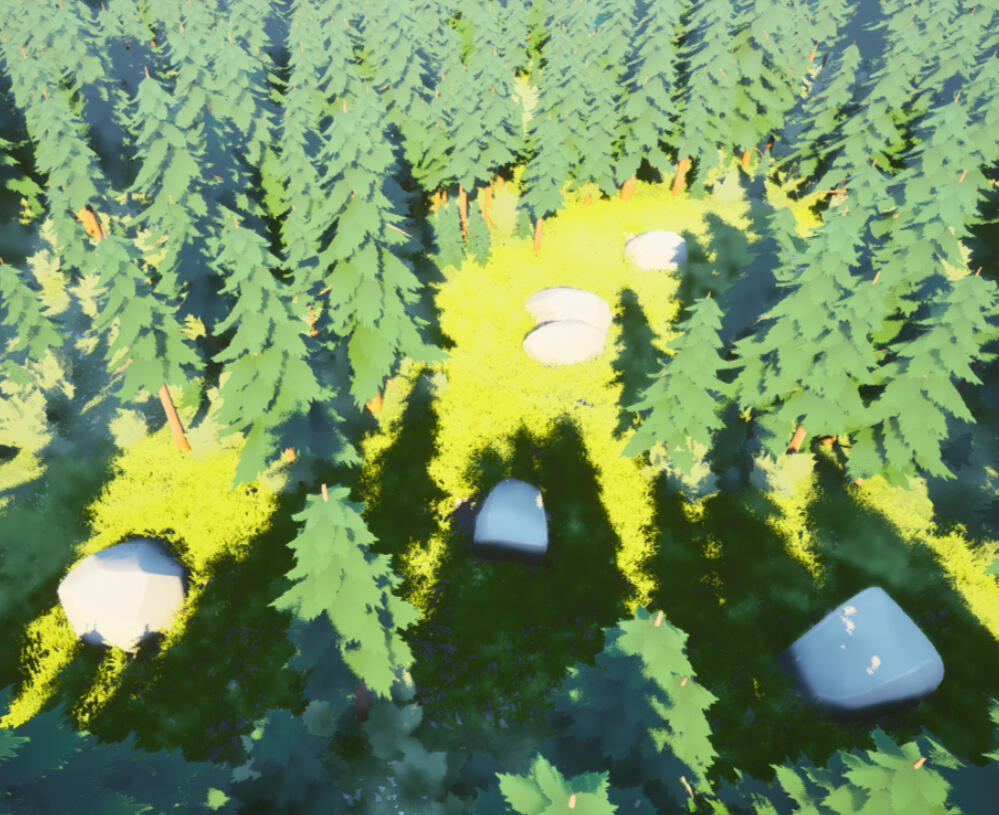
Meadows: Large stones spawn in groups near each other, and prevents trees from growing near them, creating patches of grassland amongst the larger forest.
The Undergrowth: The pine forest spawns everywhere except the rocky meadows, but still leaves enough room for ferns and bushes to grow.
Static Structures: Imagining these graphs being used in a fully open world game, I wanted to be able to handcraft my towns and cities, but let the surrounding scenery be randomly generated. By tagging certain structures as 'Static,' I could generate around them entirely.
Challenges
With so many meshes being spawned, my framerate began to drop quickly as I scaled up the usable area that could be randomly generated. The main cause seemed to be the level of detail not scaling well enough for the amount of objects in the scene. In order to continue testing larger environments going forward, I will need to optimize the scene to work with such high model counts.
Future Work
Taking these rules to the next level, the design of an open world game could have a different PCG graph for each biome or region of the world with its own set of rules. I would like to experiment with using ground textures to define these different regions, as well as taking into account local height values for differentiating valleys and mountains.
Genre: Tech Demo
Duration: 1 Month
Tools: Unreal Engine | PCG Graphs
Generating around World Objects

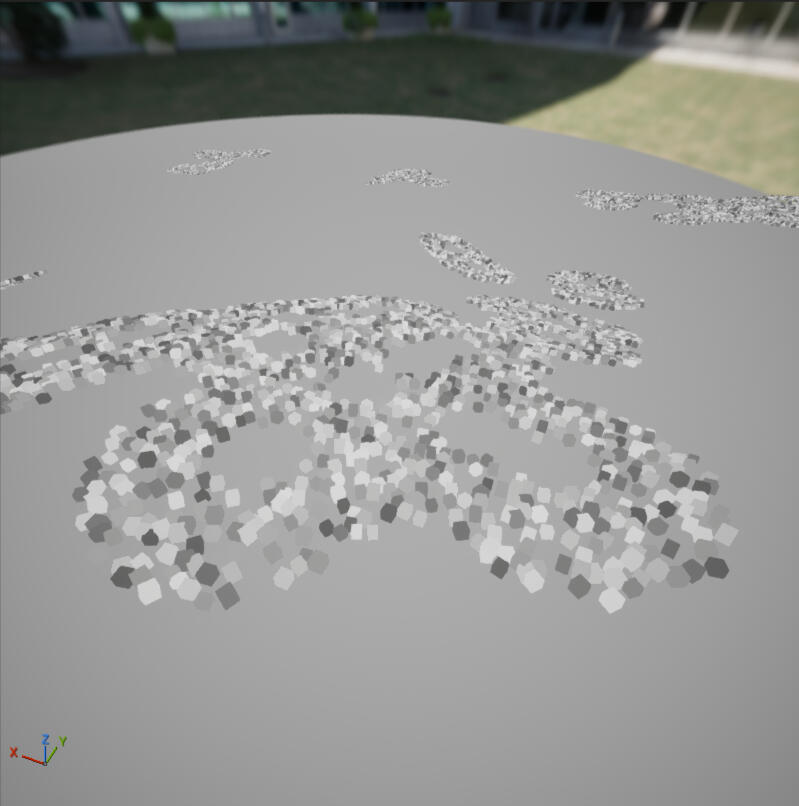
Landscape Noise Visualization

Hierarchy of Layers

Rocky Meadows
SHMUP
Survive as many waves as possible against a variety of enemies, each with unique strategies in this Asteroids inspired SHMUP (Shoot-Em-Up)! From the far ranged artillery to swarms of flotilla ships, these BOIDS (bird-oid objects) utilize deterministic action based on the position of the player and other enemies in the scene.
Artillery Ships will attack from afar and flee if the player gets too close
Flotilla ships will only approach once they’ve gathered into a swarm
Bombers will ram into the player's future position, making it difficult to dodge
Overview
My goal for this game was to create enemies that had notably distinct behaviors, so that the player could learn to react instantly based on visual response alone. This effect was achieved by providing building flaws in each of their strategies that the player could learn to manipulate.
Over the course of the semester, I created a spawning system to introduce progressively more and more enemies to be encountered in waves. With so many projectiles and enemies flying around on the screen, the collision manager takes advantage of the singleton pattern to significantly reduce the number of scattered references passed throughout the project.
Genre: Shoot-Em-Up, Action
Team Size: Solo Development
Duration: 4 Months
Tools: C# | Unity | Singleton | Github
Standard Gameplay
Some early errors with spawning enemies in waves...
Unititled Scout Game
In this stealth shooter set during the World War II era you must dodge and weave between guards patrolling the environment. You are an expendable scout during the war effort, and must hope that your skills are enough to go undetected.
Overview
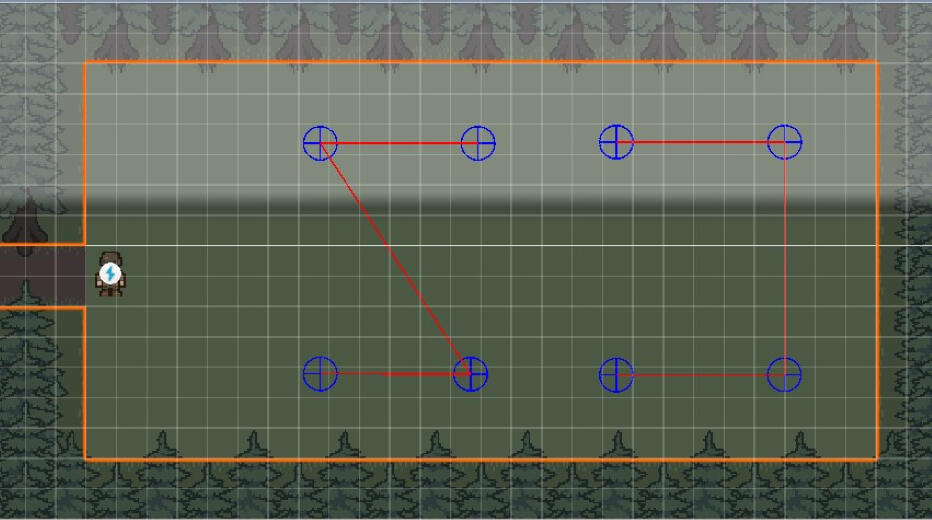
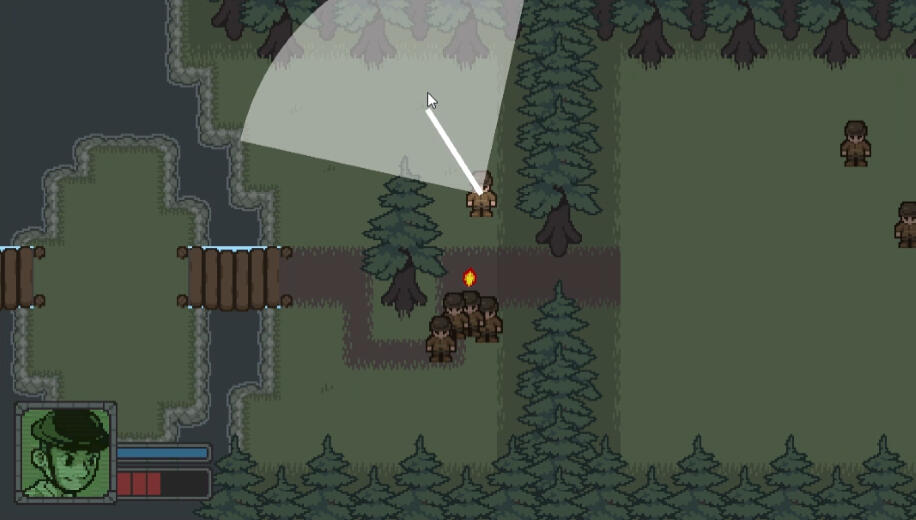
My second year at college I joined the Hack-a-Jam club, where we spent an entire semester working on a game. With our focus on stealth, I was tasked with simulating passive patrols that could become active and chase the player. I implemented a state-machine that alternates between two different pathing systems:Passive State: An enemy will follow a string of waypoints, simulating a routine patrol.Active State: An enemy will seek out player using the A* (A-star) pathing system. They are able to navigate a world with unforeseen obstacles and attack, but after some time they will lose sight of the player and return to their origin.
Challenges
Implementing the A* library was a completely new experience for me, adding a wealth of systems of which I barely scratched the surface. I found myself facing logic problems where the enemy would rather go around a river they could shoot over, but not walk over. From this experience I'll be much better prepared to design enemies with the A* system in mind.
Genre: 2D Stealth Shooter
Team Size: 5 Developers
Duration: 4 Months
Tools: C# | A* Pathfinding | Unity | Github
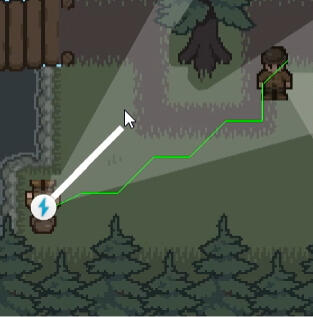
A* Pathing

Enemy Path Routines

Enemy Chase
BOWNUS
You are a shooting comet fighting off a horde of eldritch creatures from beyond the veil of space! As your combo meter increases, it exponentially affects your movement speed and firing speed to nigh uncontrollable levels. Getting hit decreases your combo, so you'll need to practice controlling your ever increasing velocity!
Overview
Our inspiration came from games that have been unintentionally broken by players maximizing the benefits from perks and abilities, these effects make them uncontrollably fast to the point of being more difficult than they are worth. We leaned into this idea and twisted the game jam's theme of bonus to be a detriment to the player rather than... well a bonus. This made for a short but intensive chaotic game loop for our weekend game jam submission!
Personal Work
Combo Meter: I designed the power scaling of the player, which increased the difficulty of the game over time by raising the speed of the player exponentially, before resetting on hit.
Bat Creatures: I worked on our third enemy's design, the bat-like creatures that swarm toward the player, but are much slower than the other enemies.
Challenges
Facing the limited amount of time we had to develop our game, our team took on the additional challenge of working with the mostly unfamiliar engine Godot. Our team lead was well experienced with the its tools that had a positive reputation for developing 2D games, so we all agreed that the added difficulty would be well-worth the experience. Despite facing a time crunch, we engaged with new systems and tools that I feel much more confident to use in the future.
Genre: Shoot-Em-Up, Action
Theme: Bonus
Team Size: Solo Development
Duration: 46 hrs
Tools: C# | Godot | Github
Standard Gameplay
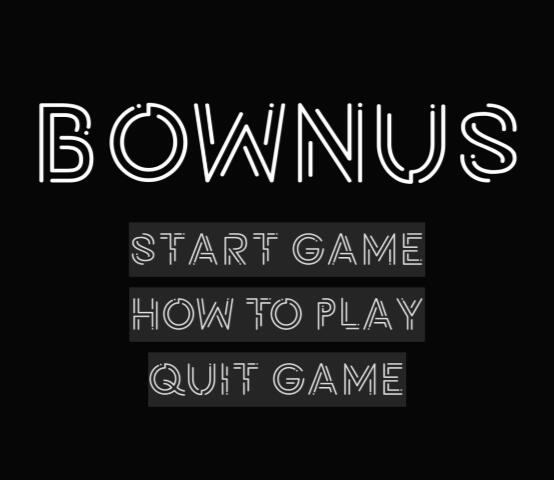
Start Menu
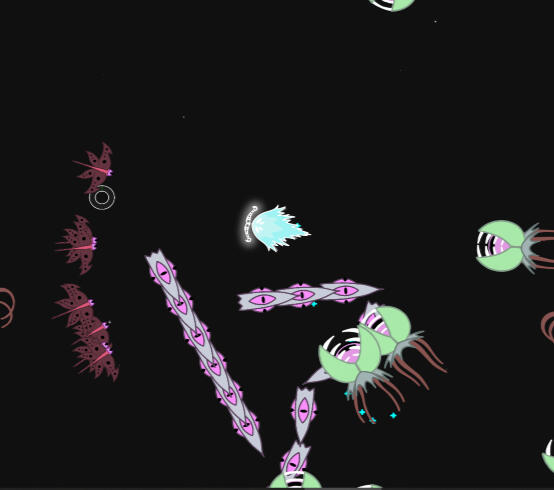
Enemy Variants
Wizard Cube
This is the Wizard Cube Tech Demo! As the cube, you are able to summon balls of fire that blast any nearby objects away from the explosion, including you!
Overview
This project started out after I designed some basic animations for a 2D art course in college. While the idea of using your attack as a form of movement - your only form of movement - is not a new one, it stuck with me as a fun mechanical exercise that I wanted to implement! So, I decided to make a quick tech demo for what a full game with this ability might feel like.
The Work
Object Pooling: I implemented an object pool for the many instances of the fireball in the scene to reduce the number of instances being created at runtime.
Cube Feel: I gave the player a sort of bouncy rebound whenever they hit a surface. This choice makes the player's movement feel continuous, as they string together a chain of explosions to soar through the level!
Challenges
I wanted to test out a different engine instead of my usual set of tools, and at the time Godot was becoming very popular in the 2D space. Godot has a comparatively small amount of learning material online compared to other engines like Unreal and Unity, which made the experience a trial by fire — especially since the engine had just updated to 4.0, making many of the few tutorials online obsolete.
Genre: 2D Tech Demo
Team Size: Solo Development
Duration: ~ 2 months
Tools: Godot
Movement Demo
Connect'In
Connect'In is a satirical mad-libs text game about creating as many topical and popular posts as possible to gain connections on this career building website. The algorithm favors quantity over quality when awarding you with connections, as well as including certain buzzwords. If you fail to meet the connections quota three times — you lose!
Overview
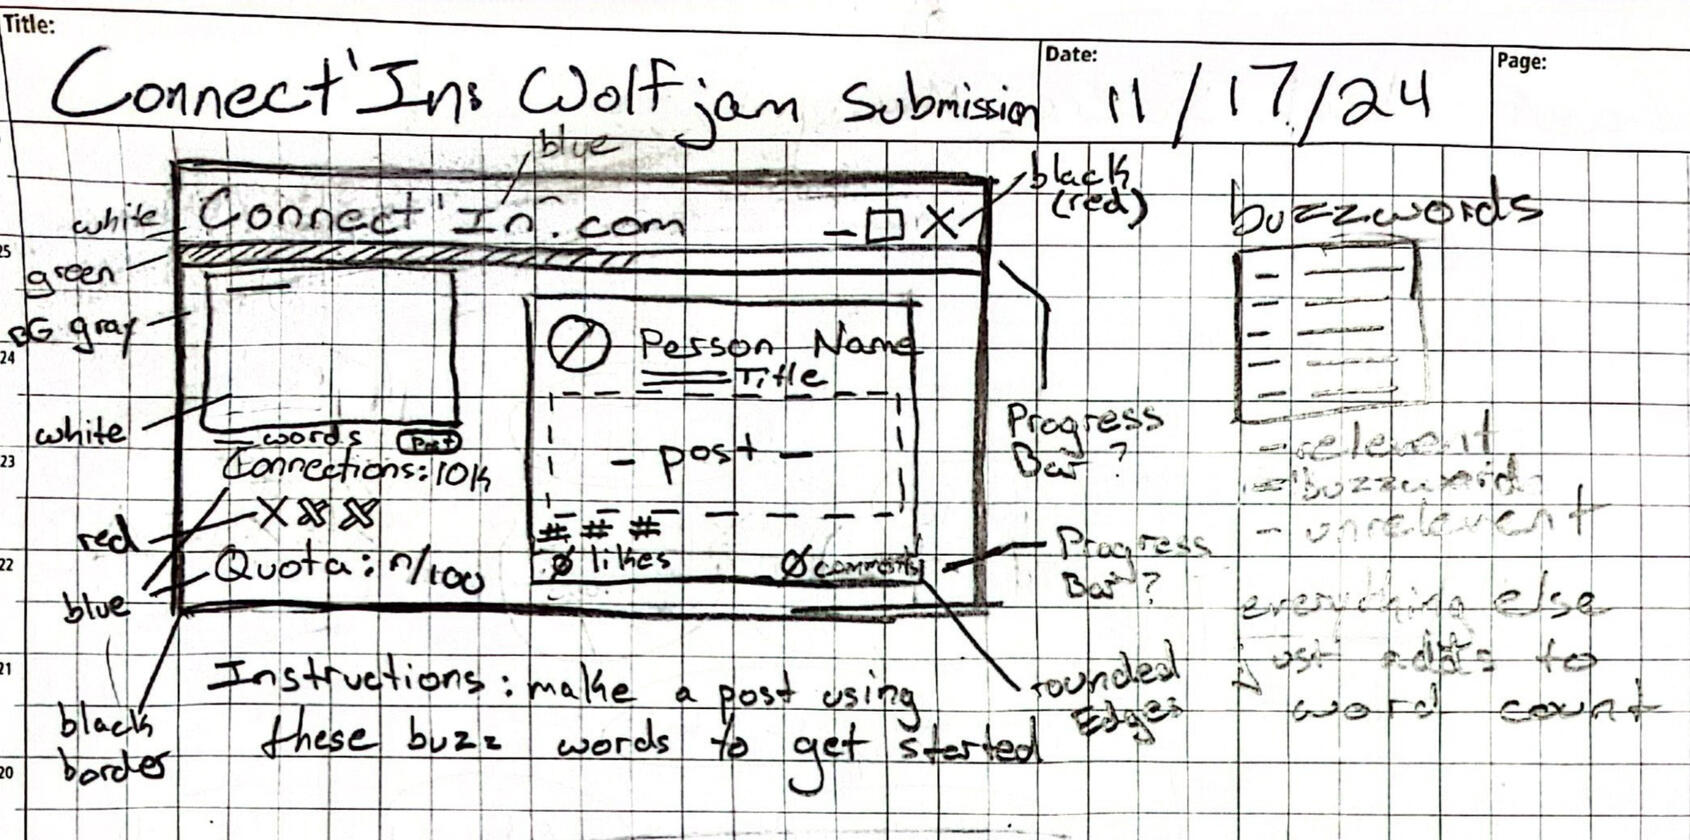
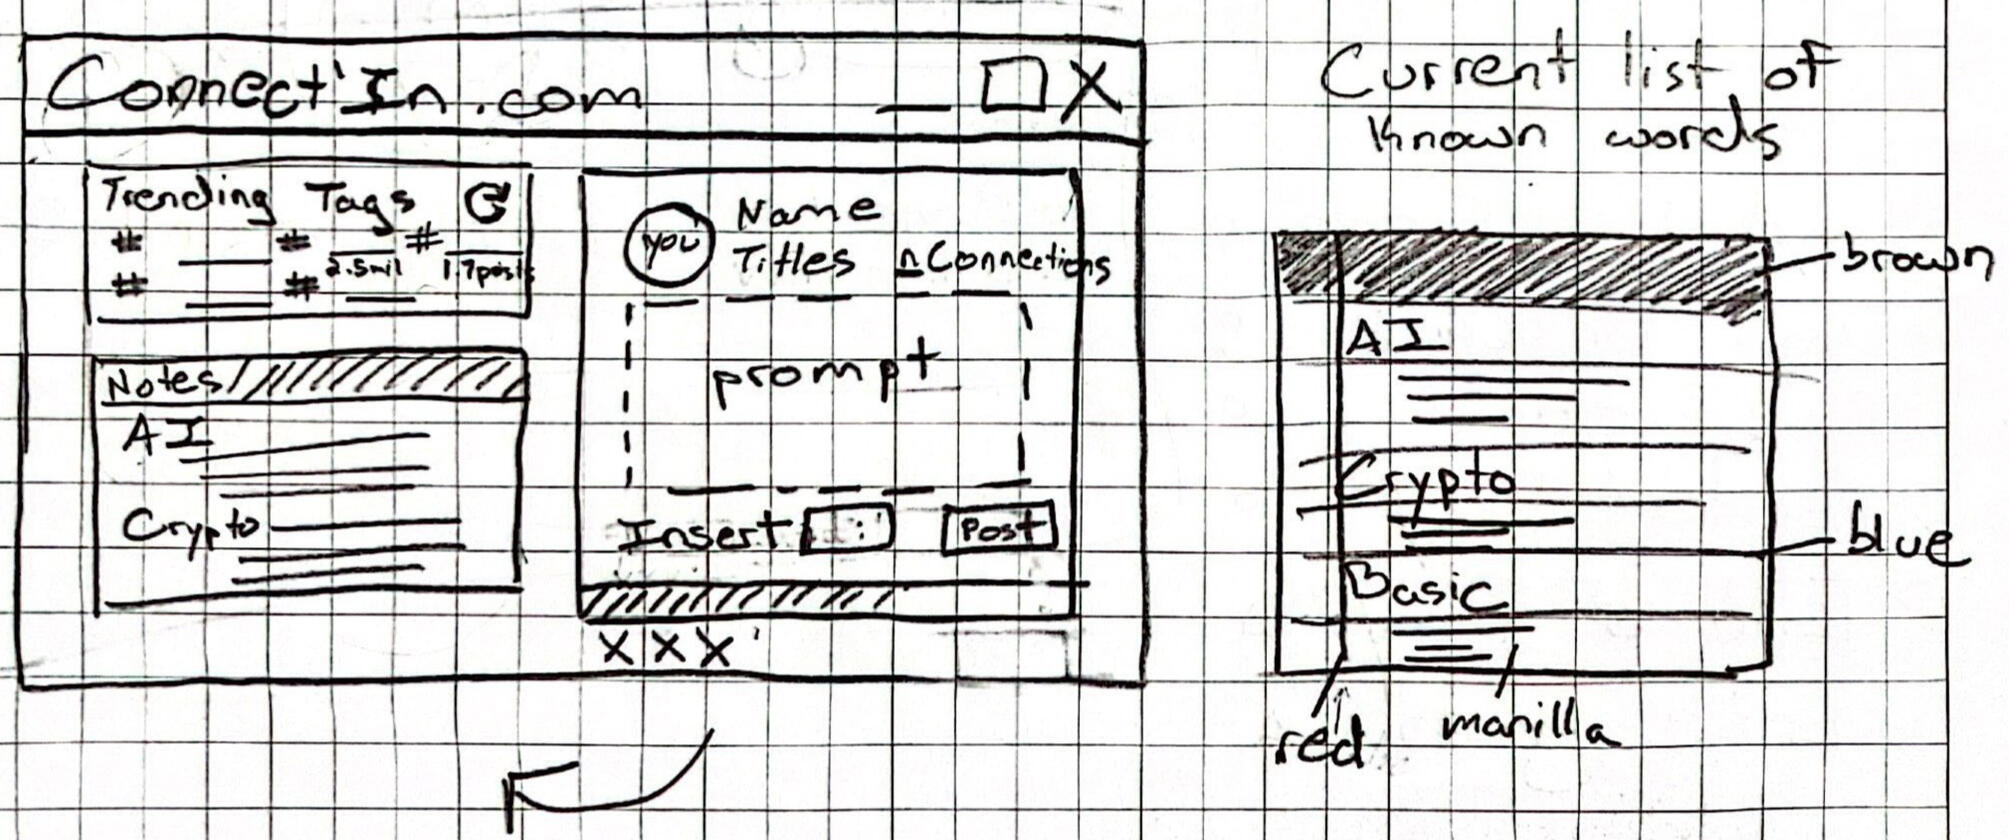
I created the user interface for the project entirely within one scene. Once we realized that the tutorial and menu screen could be presented by the game's notepad and the post-generator, our single page was able to be reused throughout the entire game. I also added several accessories such as the like and comment values to give the app some more random behavior.
Most of our planning was made within an hour of the theme's release, and given the 26 hr scope we were able to put quite a lot into our game as a three person team. For such a short game, by dedicating a decent amount of our time to preplanning, we did not have to deal with bigger changes to the game eating up our time later in development. Every member had a clear set of tasks to complete from start to finish.
Genre: Psychological Horror, Simulator
Theme: Connection
Team Size: 3 Developers
Duration: 26hrs
Tools: Unity | Github
Gameplay

Layout v1.0

Layout v2.0
Mech Attack
Lorem Ipsum
Overview
Lorem Ipsum
Lorem Ipsum
Genre: Psychological Horror, Simulator
Team Size: 5 Developers
Duration: 26hrs
Tools: Unity | Github
3D Modeling Work
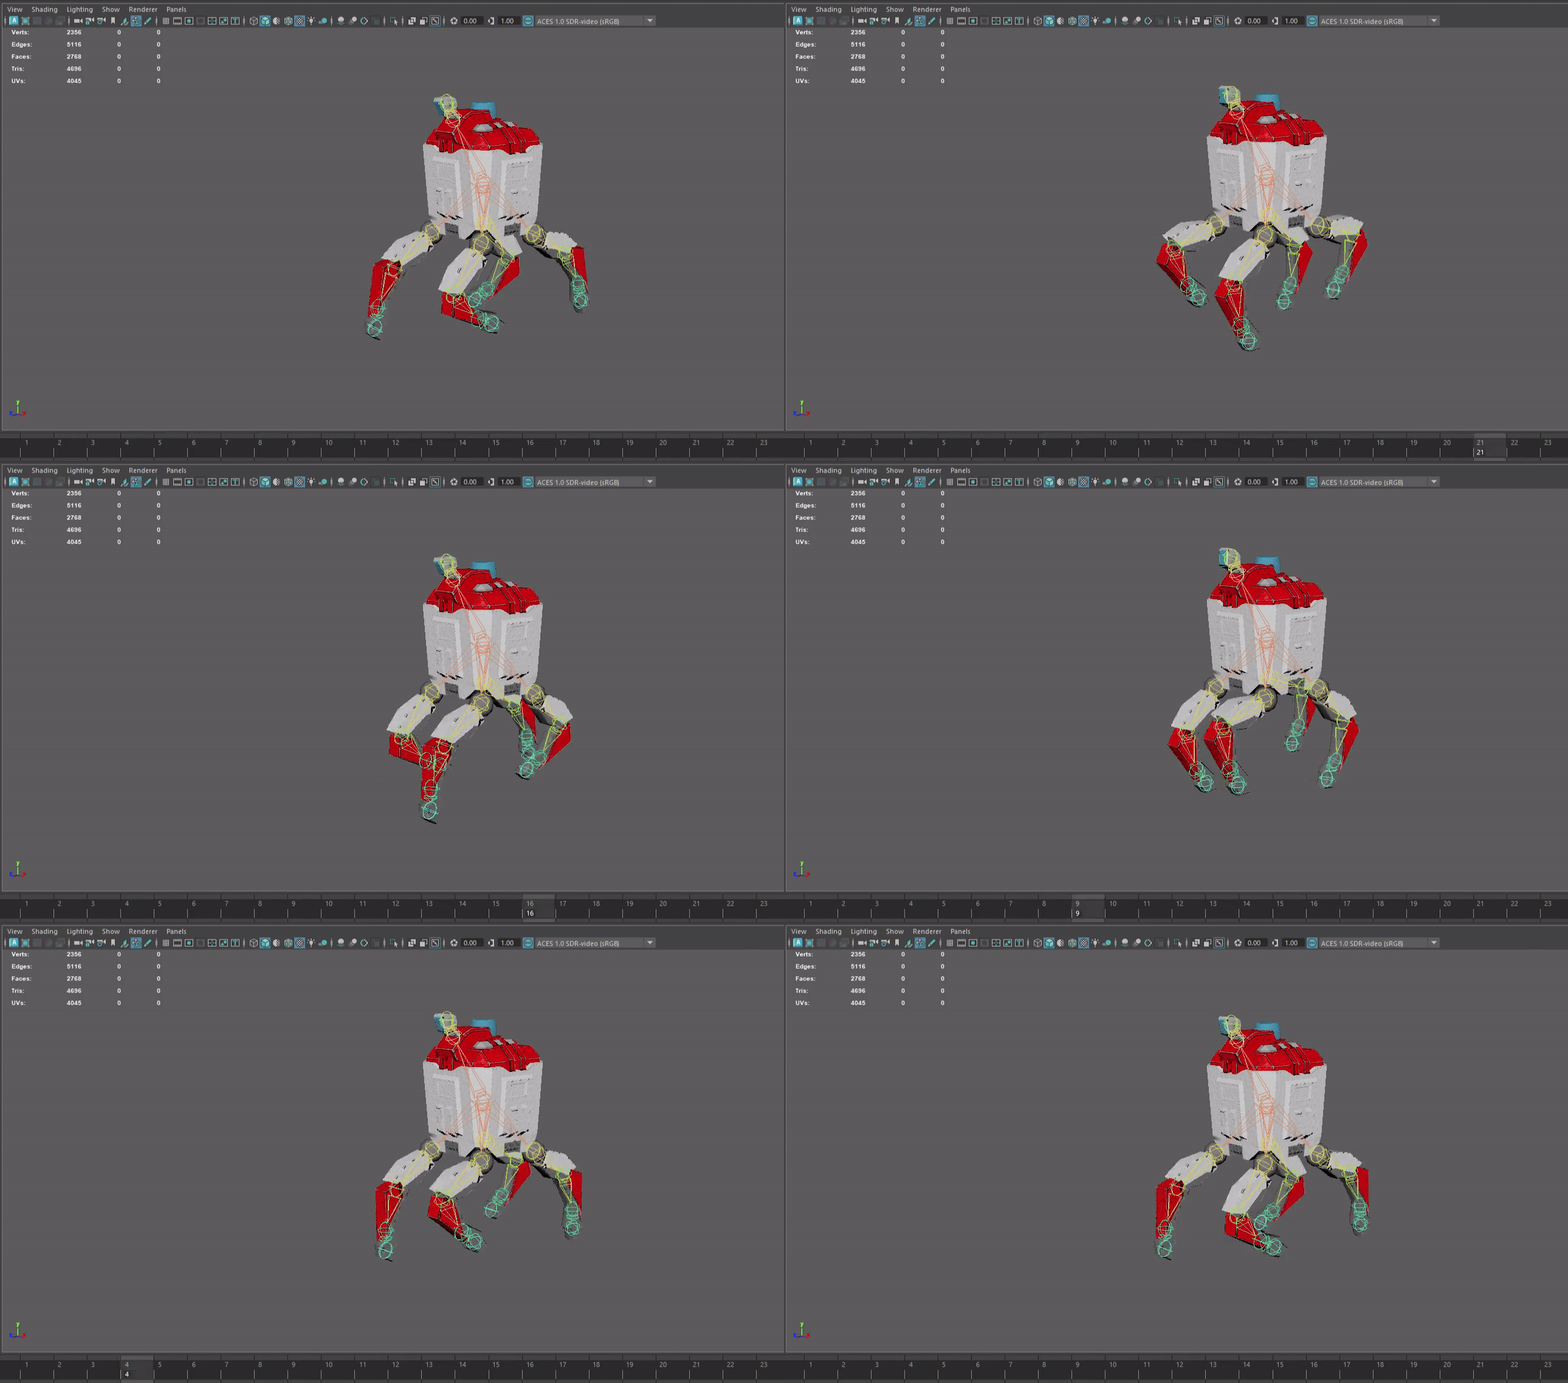
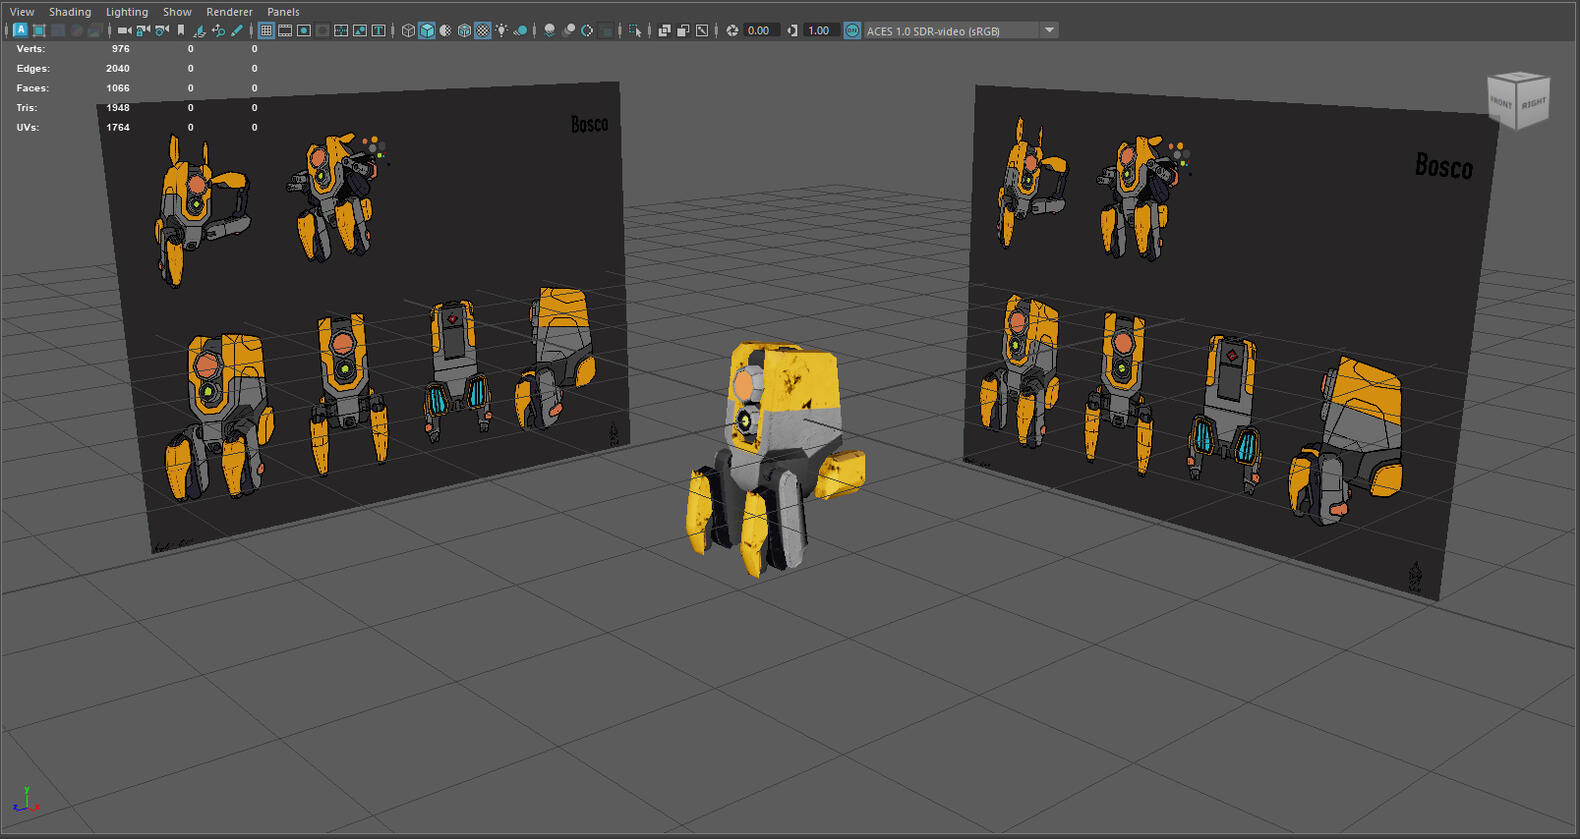
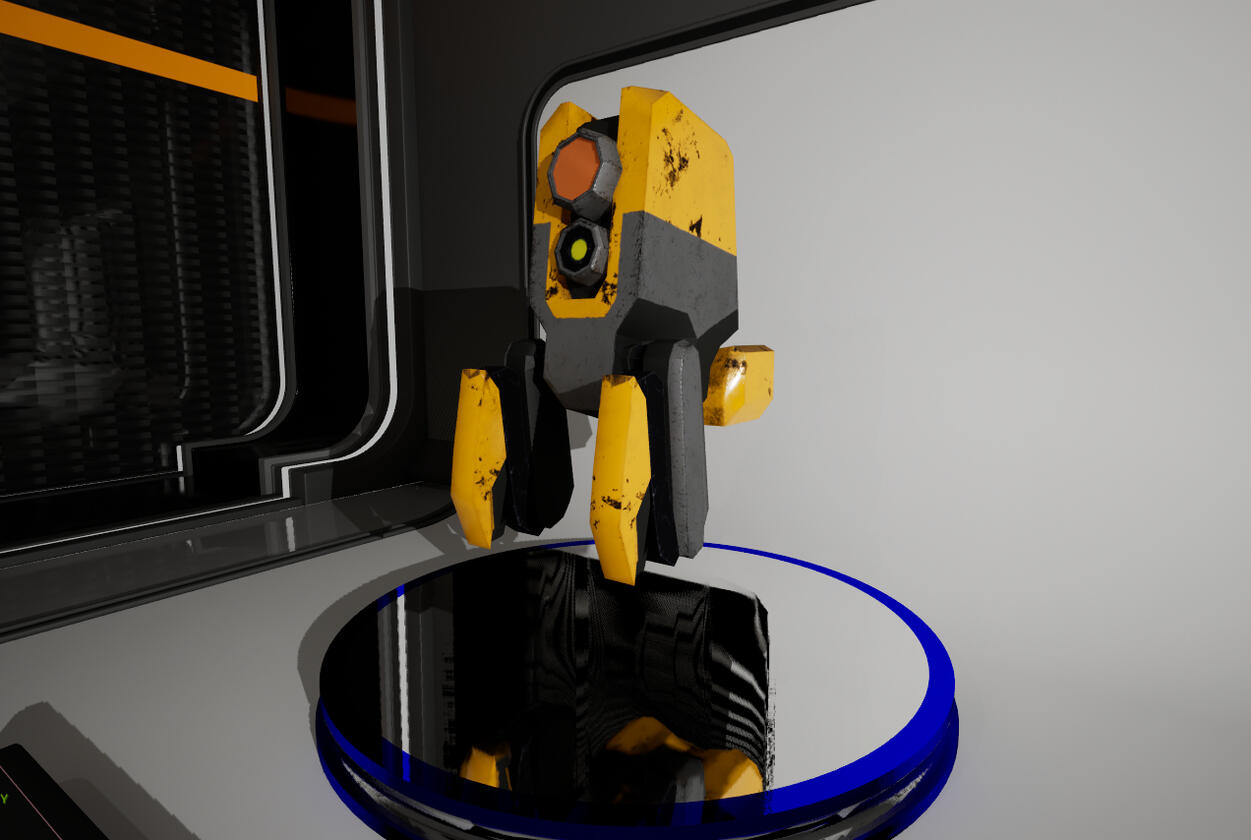
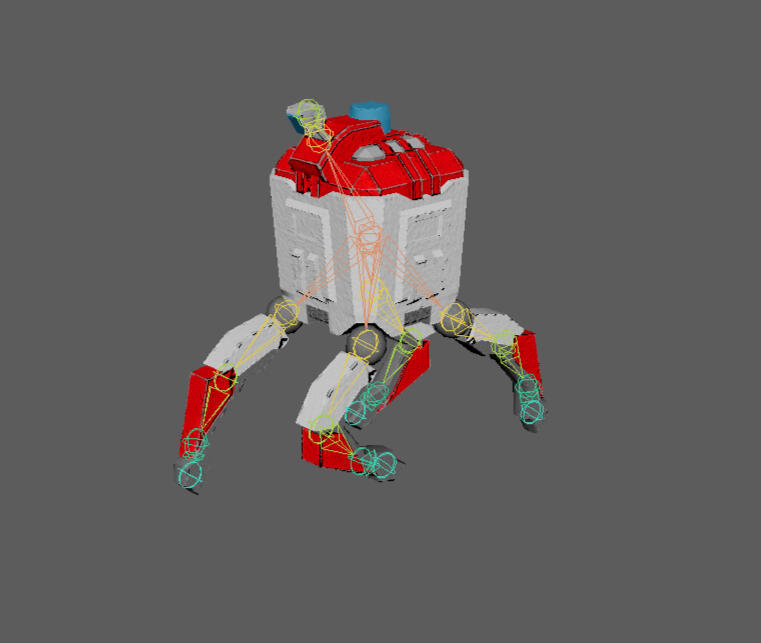
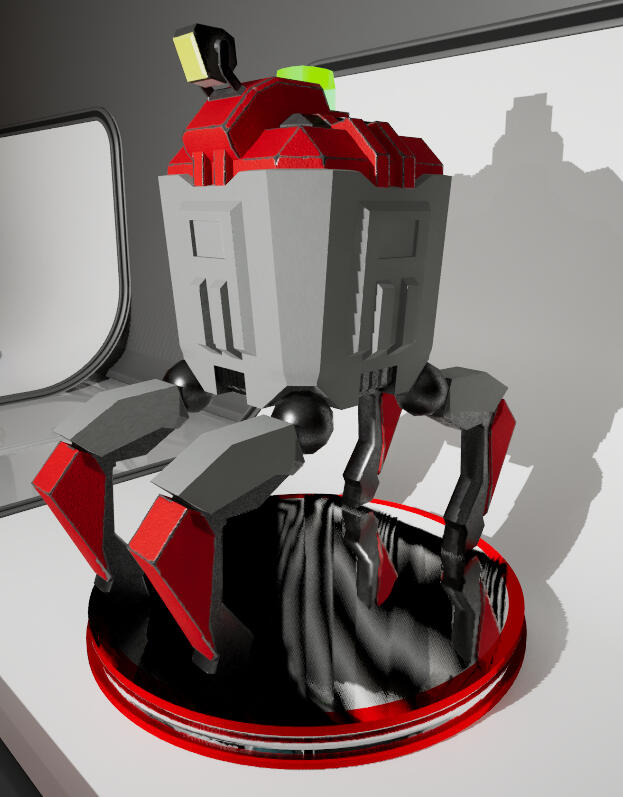
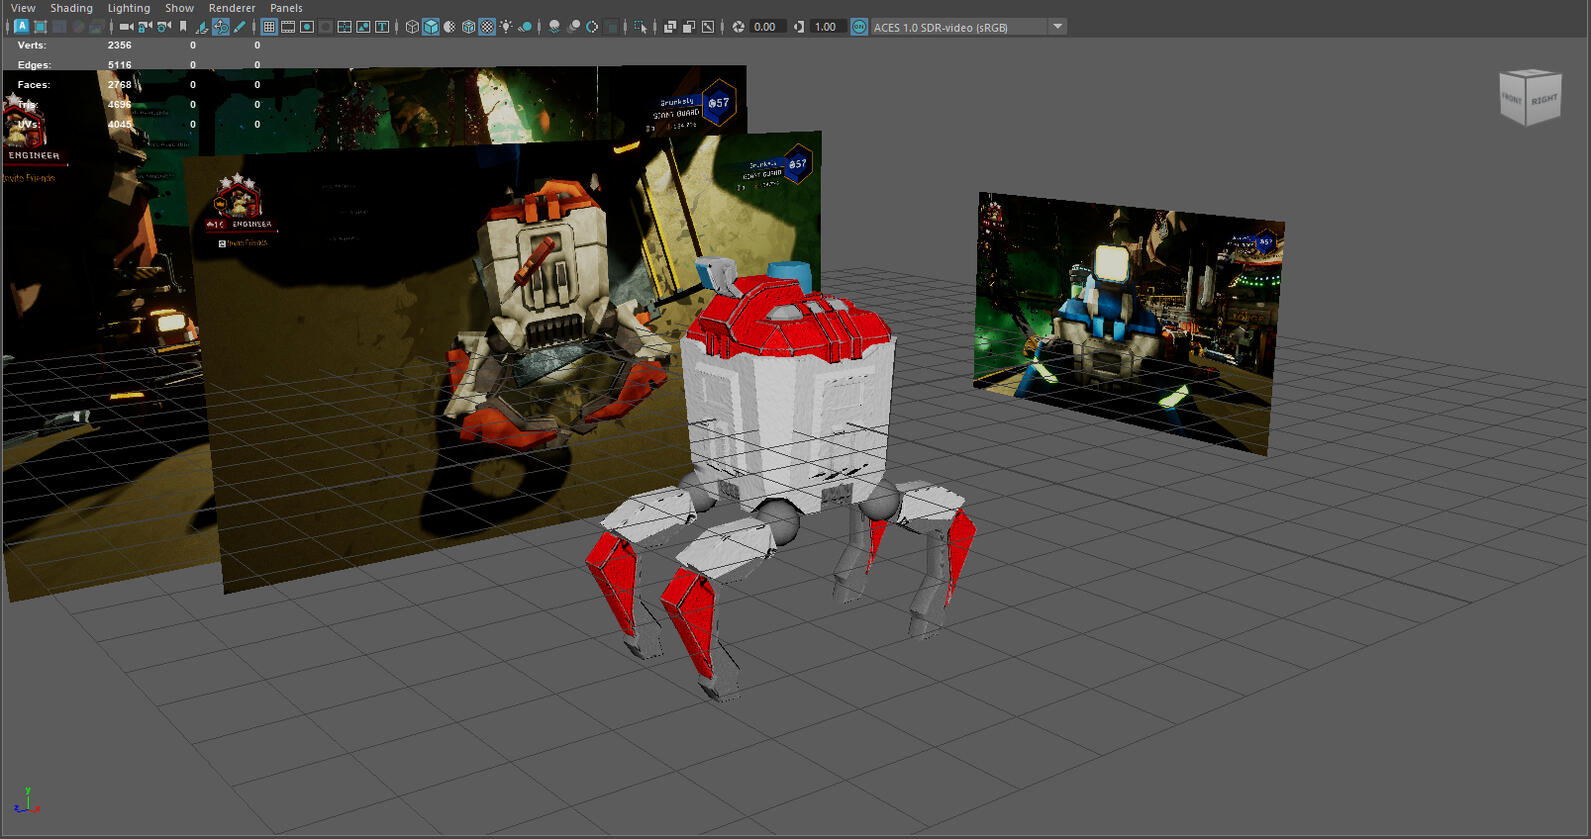
Modeled and animated in the program Maya are two mining robots, APD-B317 and a M.U.L.E. unit, both from the hit co-op video game Deep Rock Galactic. However, I have chosen to refer to them here by some of their respective nicknames in-game — Bosco and MollyCreated for IGME 216.06 - Experience Design for Games & Media
Overview
As a game developer my work is multidisciplinary by nature — including production, design, development, narrative, and in this case sculpting and animating 3D models. Having an understanding of as many of these processes as possible gives me the perspective necessary to work and communicate across many different teams of expertise.These particular models are the end product of my fourth semester at RIT; modeled, UV unwrapped, and textured! For Molly's model, I created an additional walking animation to test the quality of my rigging.
What I Learned
This project gave me a better appreciation for time-prioritization and efficiency; creating a model with as few triangles as possible could still render a more complex texture on top of, as well as giving joints extra details that would deform properly during animation. On the other hand, I ended up spending far more time on UV unwrapping than was necessary because I wanted to make it just perfect - at the cost of my time being better spent on other work. In this case, the best unwrapping would have been 'good-enough' to start texturing rather than the 'perfect' touch ups that did not significantly affect the model's quality.
Duration: 1 month
Tools: Maya | Unreal Engine | Substance 3D Painter
Molly's Walk Animation

Modeling Bosco in Maya

Bosco on Display in Unreal

Rigging Molly

Molly on Display in Unreal

Modeling Molly in Maya
Basement One
Question your obedience to an ever-changing set of rules, enduring fear, and uncertainty in each eerie, unsettling basement level as it twists your understanding of the truth!
Overview
Trapped underground in a series of seemingly identical levels, the player must work methodically up each floor to reach the ground level and escape this place. At each level the player will be introduced to new rules they must follow to progress – some of which are true, others are false. In order to test these boundaries, the player must interact with items and props in the environment. An anomalous creature is there to enforce the rules, and occasionally antagonize the player. Should any rules be broken, it will pursue them and send them back to the start of the level. Fail too often, and they will be trapped down there forever!
Work and Contributions
Scene Loader: I implemented a manager to load scenes asynchronously, allowing the player to keep their items with them without needing to load saved data between every scene!
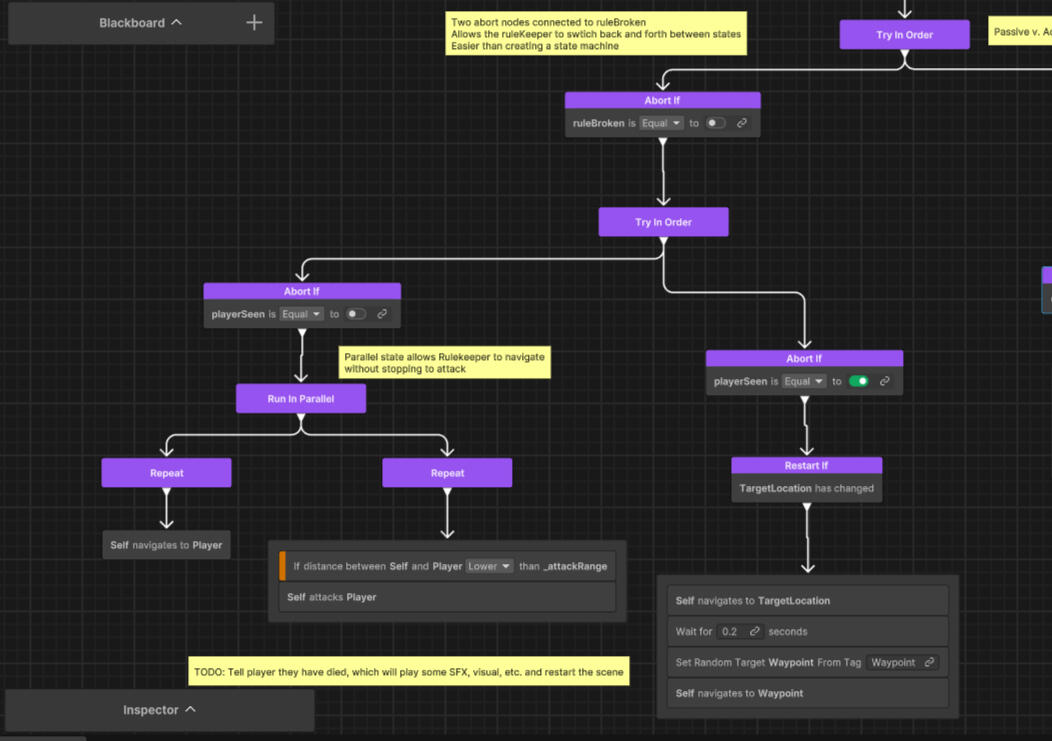
The Rulekeeper: I designed and added a behavior tree to simulate both active and passive states that the enemy NPC would follow based on the player's actions.
The Interaction System: A streamlined interaction system to interact with world space objects such as doors, buttons, papers, and more!
Problems and Solutions
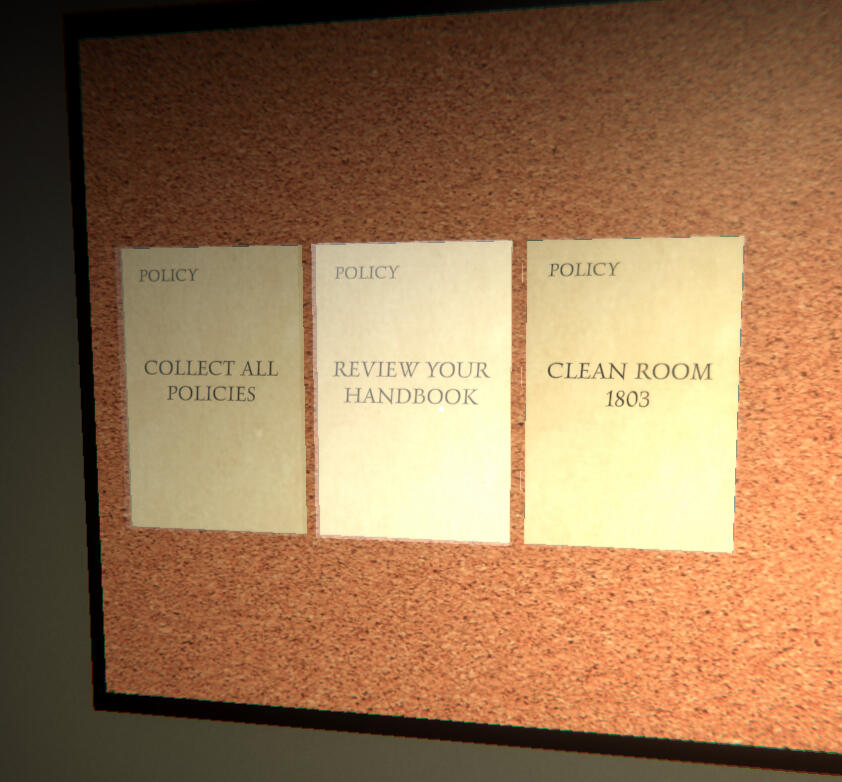
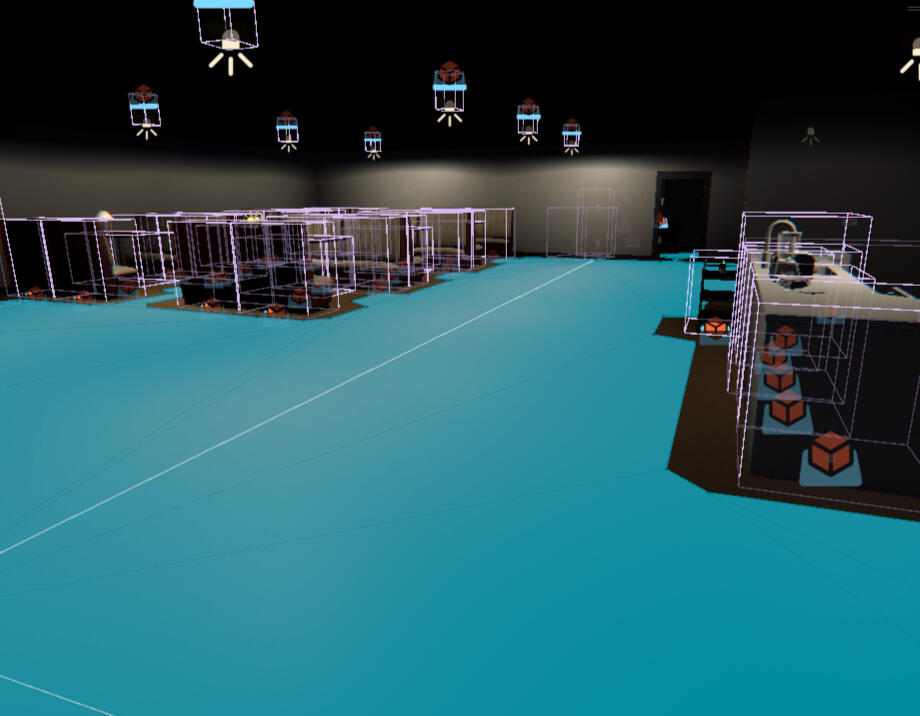
One of the biggest issues I ran into over the course of this project was getting the navigation mesh to generate properly when using outside assets. While I was implementing the generation of the navmesh in my own scene, I had created a test scene using simple spheres and cubes provided by Unity. For whatever reason however, many of the free assets that were used to quickly furnish our levels simply would not allow the navigation mesh to generate at runtime.
This issue was discovered very close to one of our playtests, and I ended up having to create it manually for each level just to make the build stable. A lot of my recent work was being thrown out at the last second which was extremely frustrating, however - I should have been testing with the new assets sooner, and I should have known that my artist was adding a bunch of new assets. It was a clear issue with our process and communication on the team, and going forward our future meetings included time to discuss possible issue that might be caused by merging each sprint's work.
Genre: Mystery, Rules Horror
Team Size: 5 Developers
Duration: 4 months
Tools: Unity | Jira | Github
Standard Gameplay
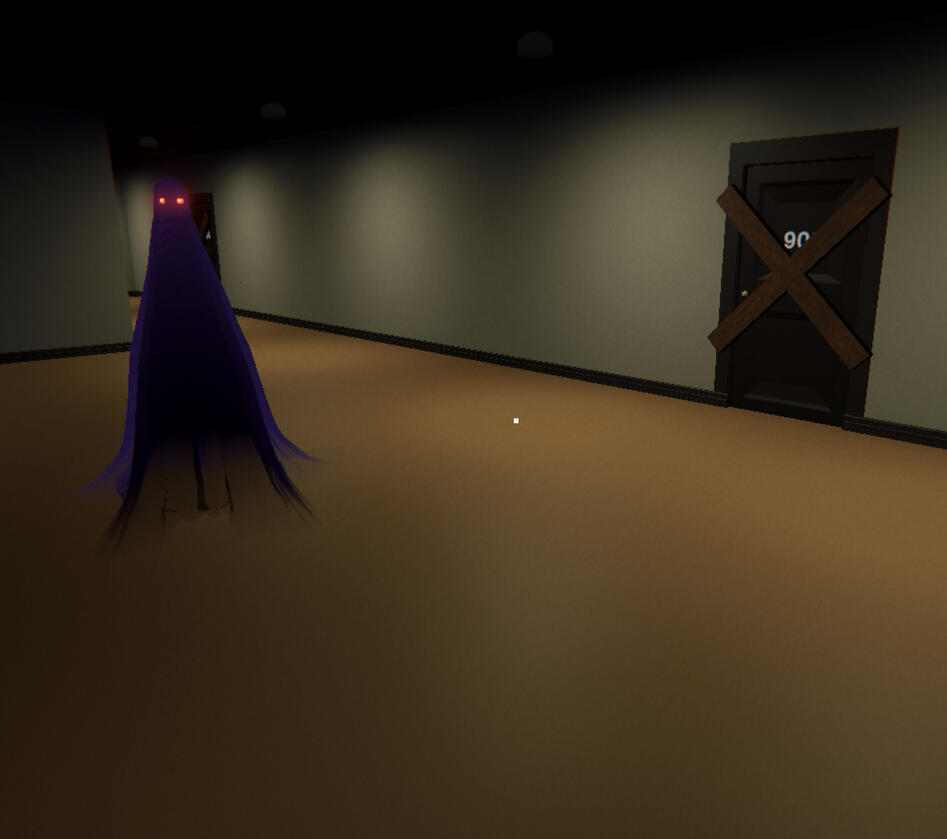
The Rulekeeper

Behavior Tree Section

Interacting with multiple papers

Ground floor navmesh
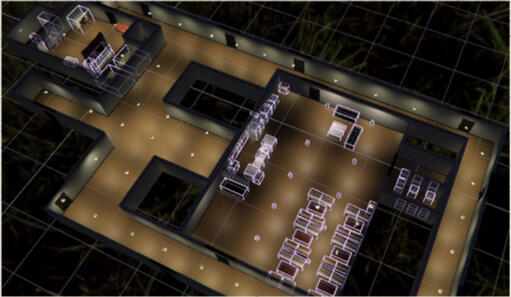
Navmesh Object Boundries
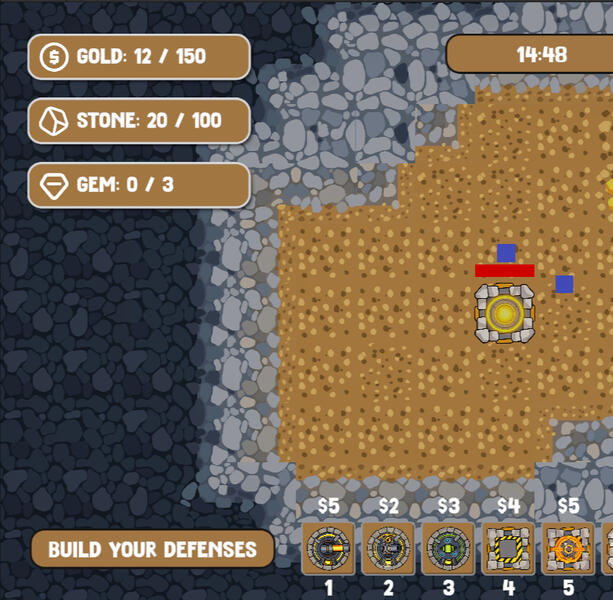
Dig Too Deep
You need better defenses — Dig new tunnels to supply the resources — Creatures use those tunnels to attack — You need better defenses
Overview
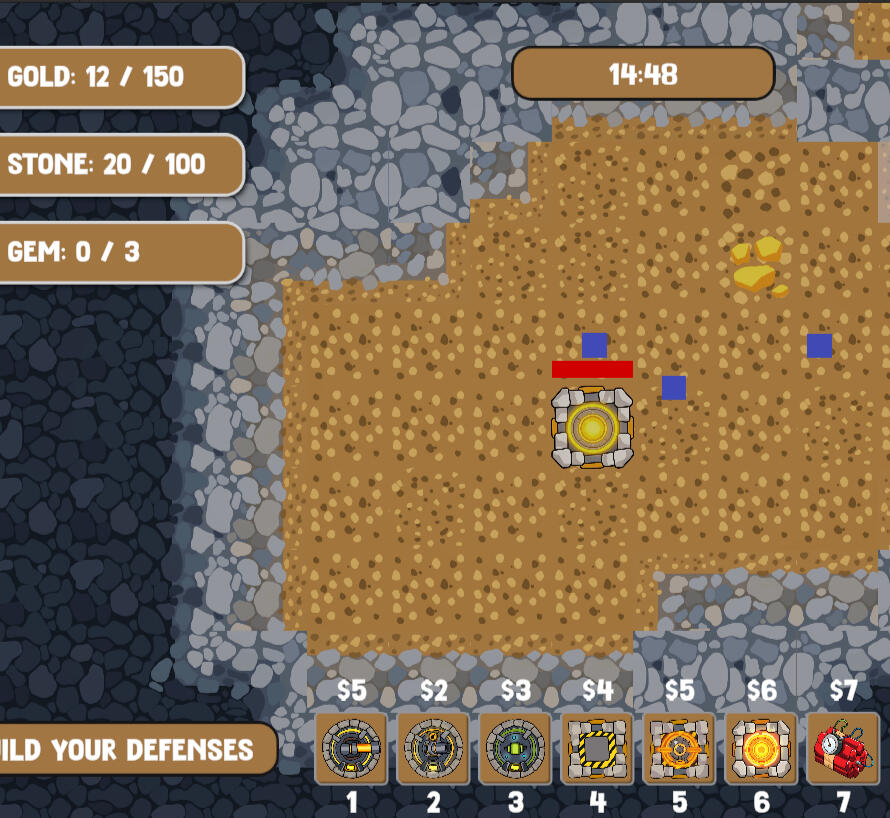
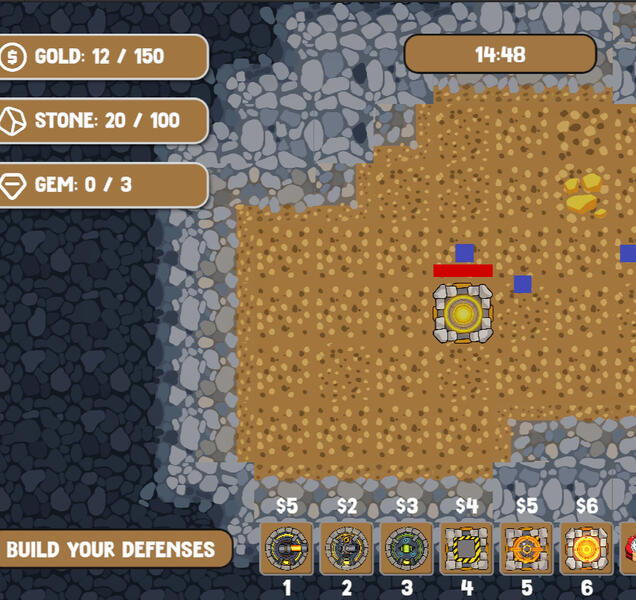
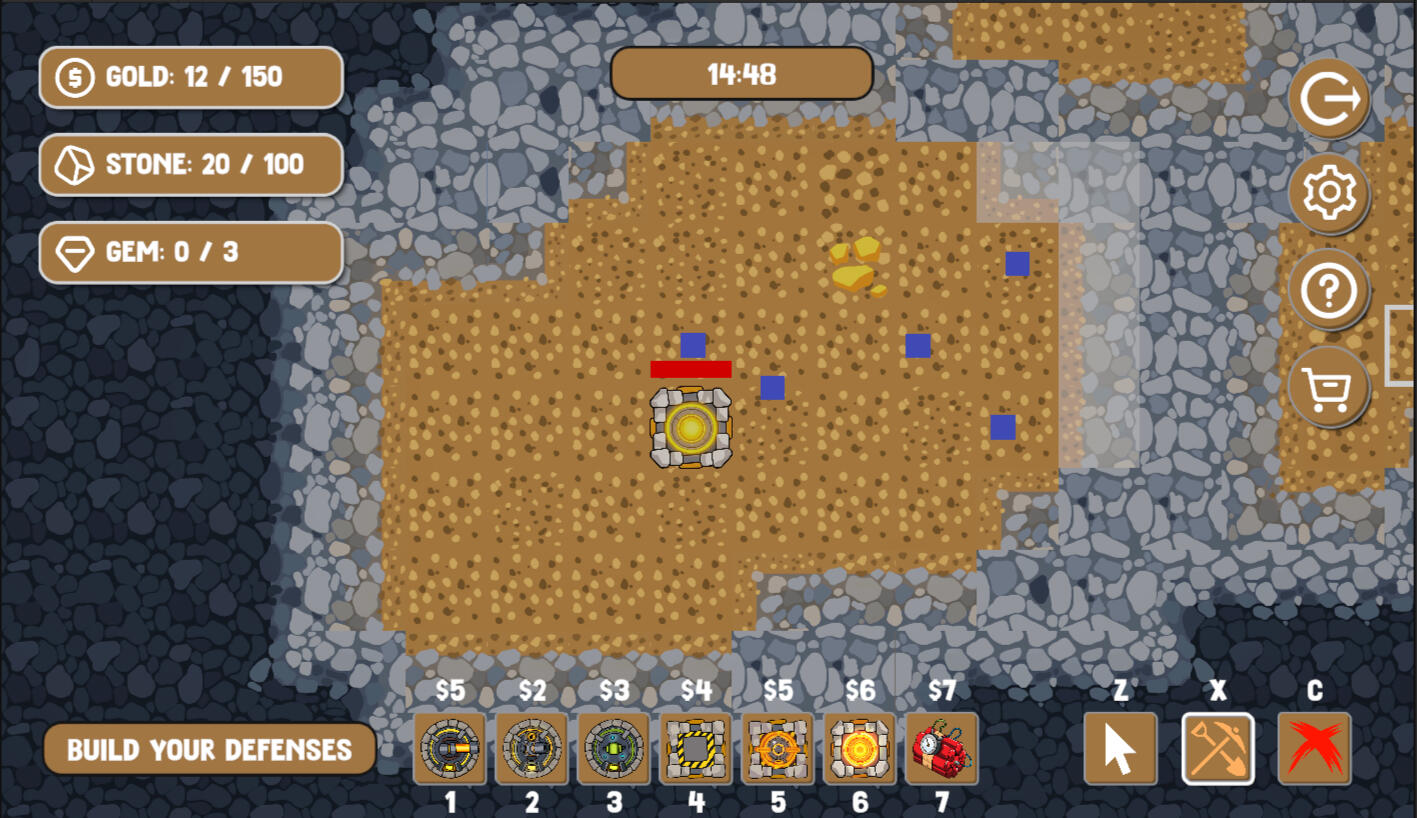
Our prompt was resource management! With four weeks to build a prototype, we decided to take the basic RTS (real-time-strategy) tower defense formula, and add grid-based digging to map exploration! Inspired by the Mines of Moria and the game Dwarf Fortress, players would be forced to expand their territory in order to gain resources from the stone and gold they mined. These new tunnels only let in more monsters, forcing the player to bulk up their defenses which needed more resources, adding more fuel and pressure back into our game loop.
Personal Work
Implemented Grid System: The creation and destruction of towers and tiles within a 2D gridspace that the player could build within.
Designed Units: Each home-tower contained a number of units that could pathfind their way to a target task, making time the fourth resource the player would need to consider.
Task Delegation System: I gave each home-tower the ability to store and delegate tasks out to their own units, and reassign units if a task was canceled.
Problems and Solutions
One of the issues we ran into almost immediately was balancing territory expansion with difficulty. We initially had no time-constraint for removing tiles and building towers, which made it too easy to clear out the entire map very quickly, making it difficult to ramp up the difficulty of the game.Miners dig Tunnels, not Caverns: To maintain the aesthetic of branching mineshafts, as well as to balance the pacing of the game, I added individual units that would need to move around the map to fulfill the player's commands. These workers would build and destroy the tiles for the player, but they would need to physically move to the task's destination, waiting a few moments to complete the action. This gave us the ability to slow down player expansion to a reasonable level, and encouraged players to choose which tiles to affect more carefully.
Genre: RTS, Tower Defense, Prototype
Team Size: 5 Developers
Duration: 4 weeks
Tools: Unity | Trello | Github

Units emerge to dig stone tiles
Standard Gameplay
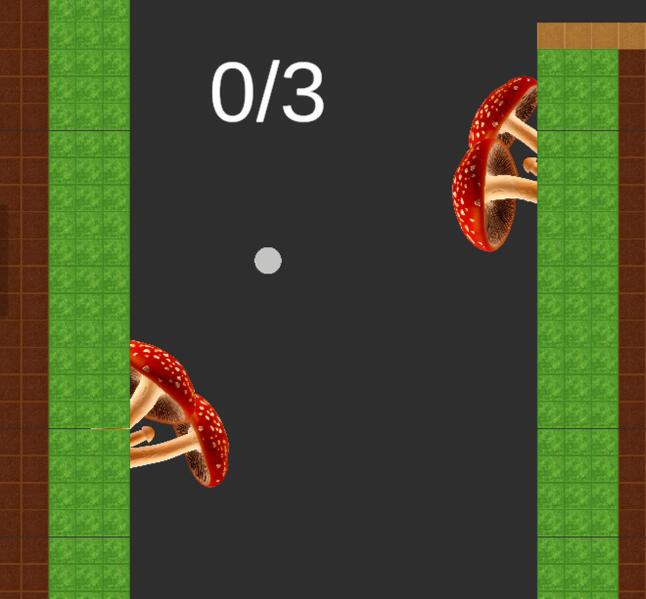
Golf Grubs
All the holes on the course of Golf Grubs have been picked up by a trio of bugs, and are on the move around the golf course! You need to land in each mobile-hole in as few strokes as possible and while avoiding other pests and dangers of the course. Time might slow down while you aim, but you will still be competing against other players for the best time overall, and keeping your name on the leaderboard!
Overview
In this prototype, we were tasked with creating a unique character for a simple 2D platformer in just three weeks. Since almost every game in the genre included walking, sprinting, and jumping by default —we wanted our player's moveset to be something new. The game of golf came up, and thinking of the player launching themselves as though they had been hit by a club seemed fun, so we decided to run with it!
Personal Work
Player Movement: I developed the movement system to launch the player, with a simple particle effect to communicate the different surfaces the player runs into that slows them down.
Sand Pits: I applied a different physics material to the sand tiles which increased their friction, slowing down the player almost instantly. While initially a negative effect, some parts of the level could be used to the player's advantage to slow down for a tight turn.
The Gopher: The gopher moves back and forth across its territory (orange tiles), locking the player's movement if they get too close. Then, it teleports them through it's gopher tunnels to a different part of the map.
The Scorpion: I created the scorpion to patrol similarly to the gopher, but if the player tries to face it head on, the tail will block them. The player instead has to get their timing right to pass over the scorpion while its back is turned.
Problems and Solutions
The biggest design issue we had to keep in mind was that our character would be able to travel a lot farther than other traditional platformers. To maintain the fantasy of a golf ball's freedom of movement with the traditional challenges found in platformers, we made two key decisions;
Everything Modifies Speed: The intelligent actors and environmental effects we proposed all dealt with slowing down or modifying the player's movement. Players instinctively wanted to go faster in playtests, so we built everything around that. If you engage with our mechanics, you can go as fast possible! Mess up, and you get slowed down...
Limits on Launching: The player could launch themselves constantly at first, almost like flying! Taking a note out of our golfing inspirations, we required players to hit solid ground again before launching. This meant players needed to launch at precise times at high speed, requiring skill while maintaining our focus on momentum.
Genre: 2D Platformer, Prototype
Team Size: 4 Developers
Duration: 3 weeks
Tools: Unity | Trello | Github
Gameplay Footage

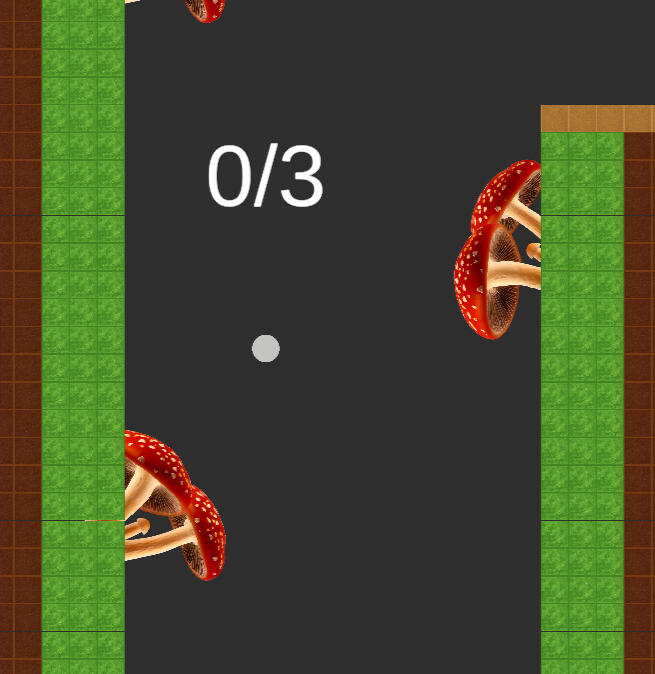
Bouncy Mushrooms send you flying when hit!
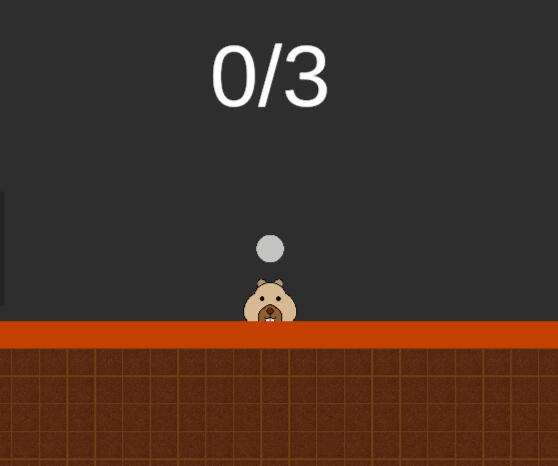
Gophers will grab and teleport the player
through gopher-tunnels!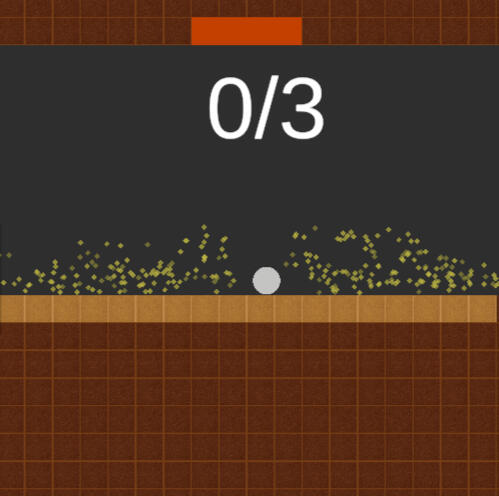
Sandpits slow your momentum
Raytracing for a Realistic Atmospheric Model
CSCI.711.01 Global Illumination Spring 2026
This page is to demo my realistic atmospheric model - this page goes into the physical background of how light reacts to our atmosphere, and how I implemented my approximation of that real world effect. This project was built on top of my raytracer model, which you can also see below!
Introduction
One of my projects in school was to create a raytracer model; building on top of this project, I chose to implement Rayleigh and Mie scattering to create a more realistic skybox, and improve the overall accuracy of the global illumination model. This page documents my journey for this project.
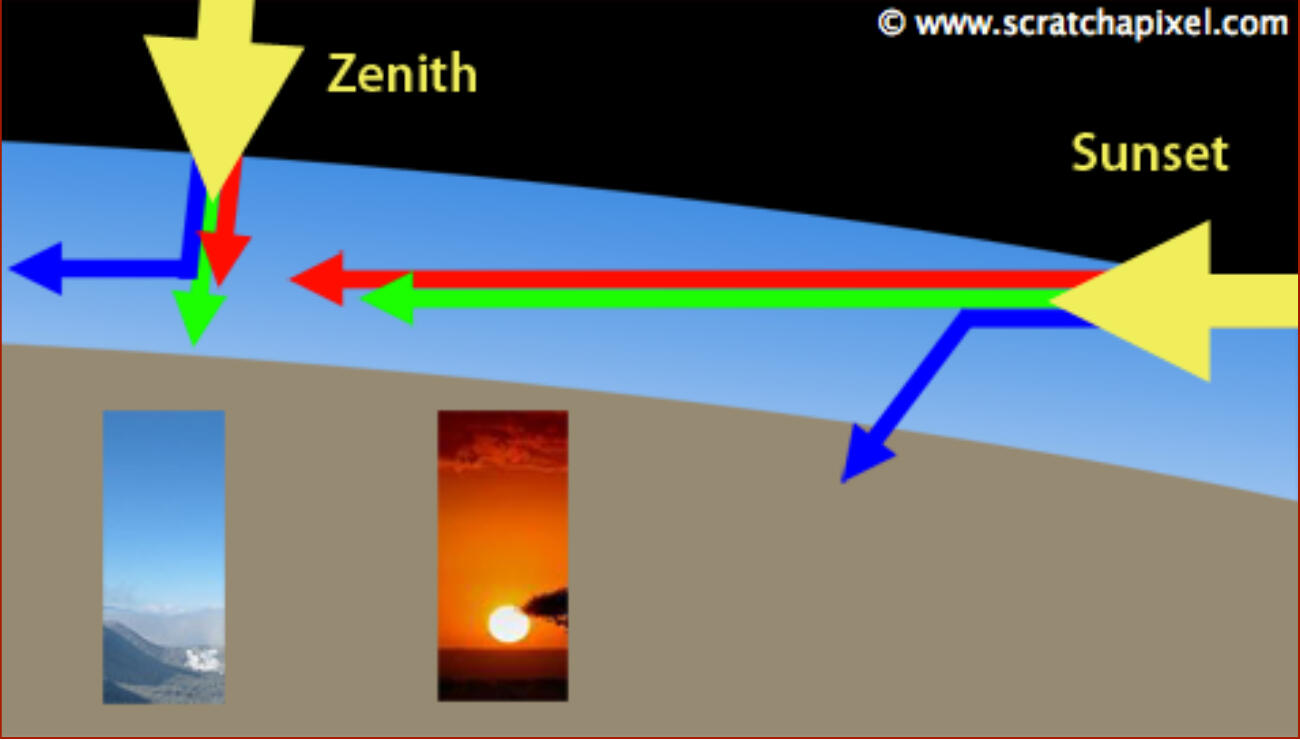
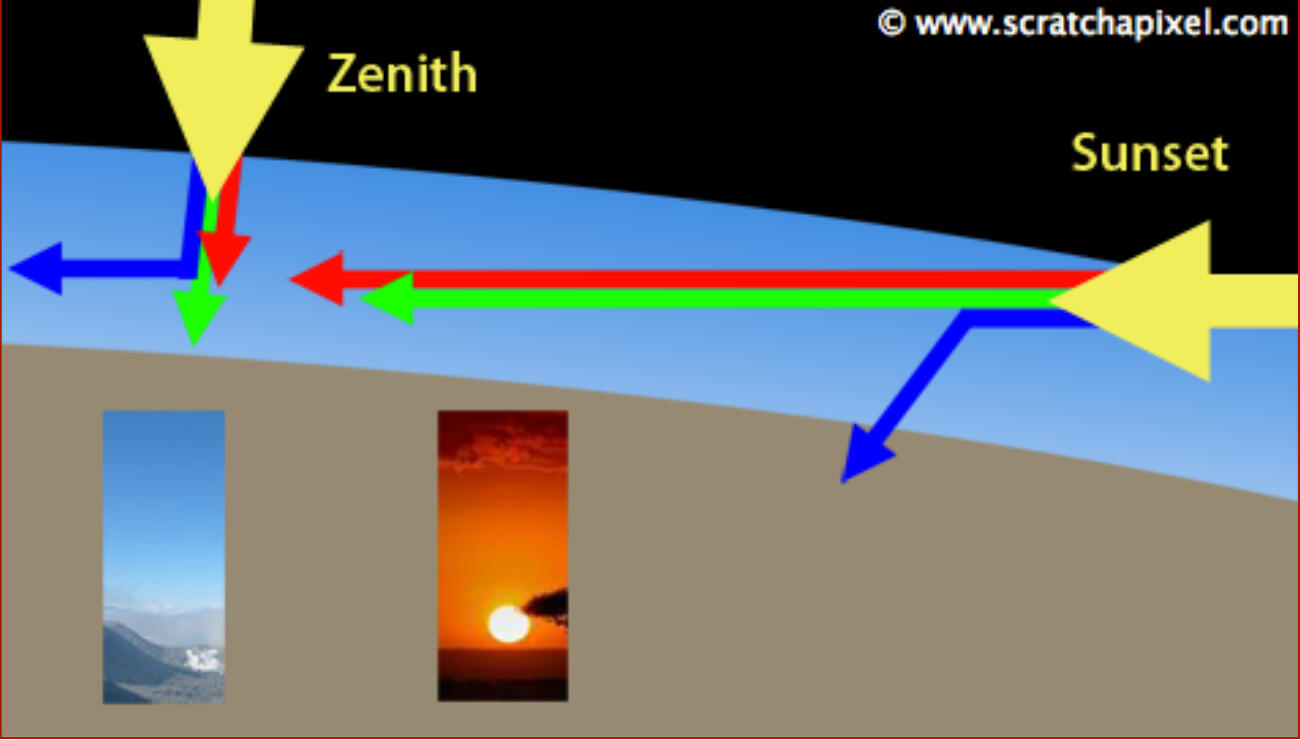
One Sky, Two Skies. Red Sky, Blue Sky: In the real world, the look of our atmosphere appears blue, red, and yellow based on the distance light has to travel through our atmosphere. The further the distance, the more red and yellow we appear to see.
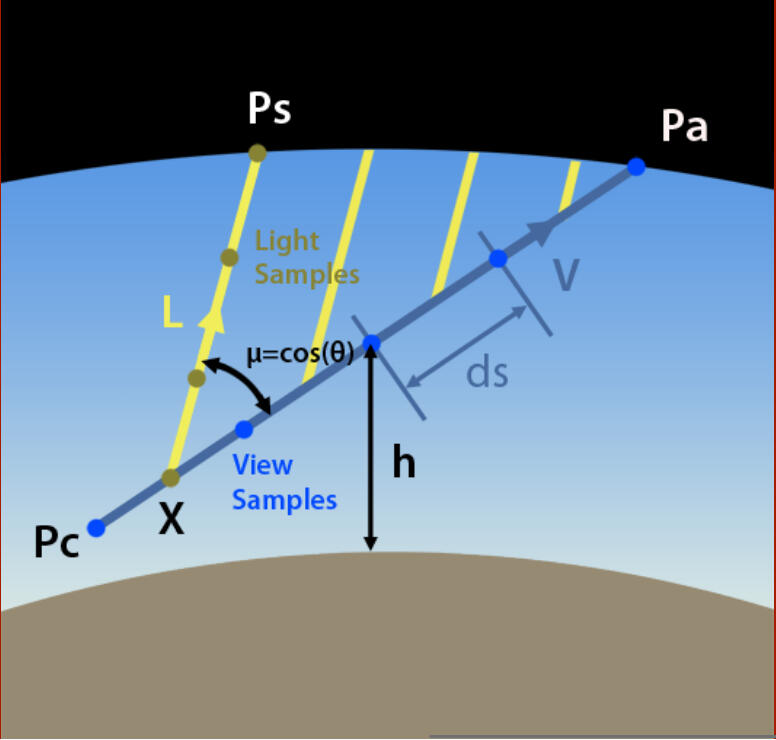
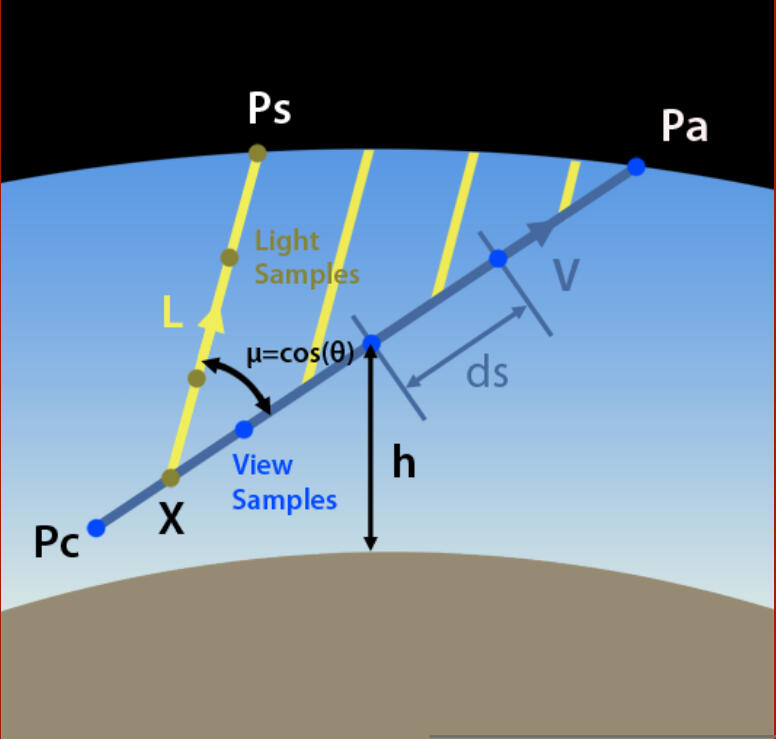
Our Model: Rayleigh and Mie Scattering attempt to model these lighting affects for different densities of air particles and their relative size by taking several samples of light while moving through the atmosphere.

Light Wavelengths Hitting the Atmosphere | Scratchapixel

Implementation Concept | Scratchapixel
Architecture
My primary reference was Scratchapixel's "Simulating the Colors of the Sky" article. I have included a small slice of the architecture from my raytracer that calculates the color of the atmosphere here.
Camera: The camera contained the illuminance values of each pixel on the screen, and applied a tone reproduction operator onto the pixels.
World: The world contained references to all the objects, lights, and other items that could affect the scene. The Spawn function would cast out a ray into the list of objects, but if nothing was hit it would instead return the value of ComputeIncidentLight.
Atmosphere: This class contained the bulk of our calculations. Once called, ComputeIncidentLight would take a number of sample values as it moved from the surface of the earth to the edge of the atmosphere. It also contained several physical variables describing the atomosphere that could be altered to create more interesting skyboxes.
Update: While the implementation was not real-time, I also added the option to store a series of rendered images while updating the objects in the scene.
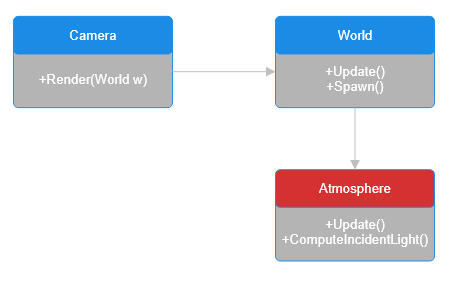
Slice of the Atmospheric Architecture
Systems
I had assumed that modifying my current raytracer to accommodate a realistic atmosphere would take more leg-work, however it really boiled down to replacing the basic background color to instead return the result of the atmospheric calculation. Nevertheless, there were of course several key issues I had to overcome along the way.
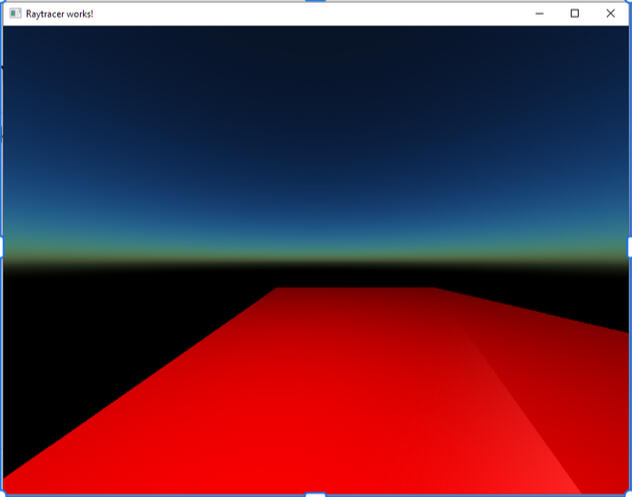
Mid-Checkpoint

Final Result
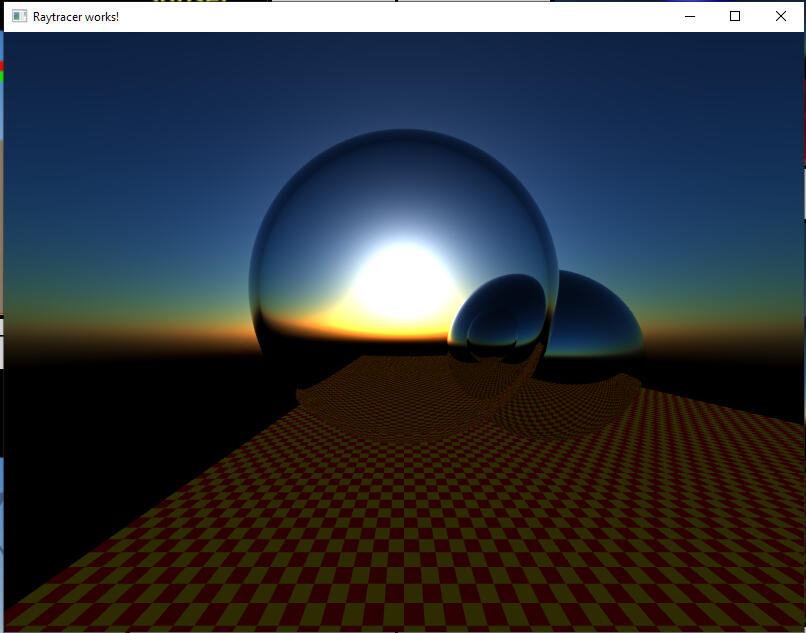
Finding the Sun: While I was able to initially render the horizon, it took some time to get the actual sun to appear. Planet-size distances were being plugged into an exponential, messing with the lighting calculations and basically removing the luminance values from the sun. For now a simple check limits these values to a usable number, but I believe scaling the calculations with a larger measurement value would remove the need for this temporary fix.
Proper Tone Mapping: My initial tone mapping was very simple, and returned a bland horizon that changed little depending on the angle of the sun. Once I properly dealt with HDR, I started to see much more interesting effects throughout the day cycle, notably the sun 'melting' as it approached the horizon.
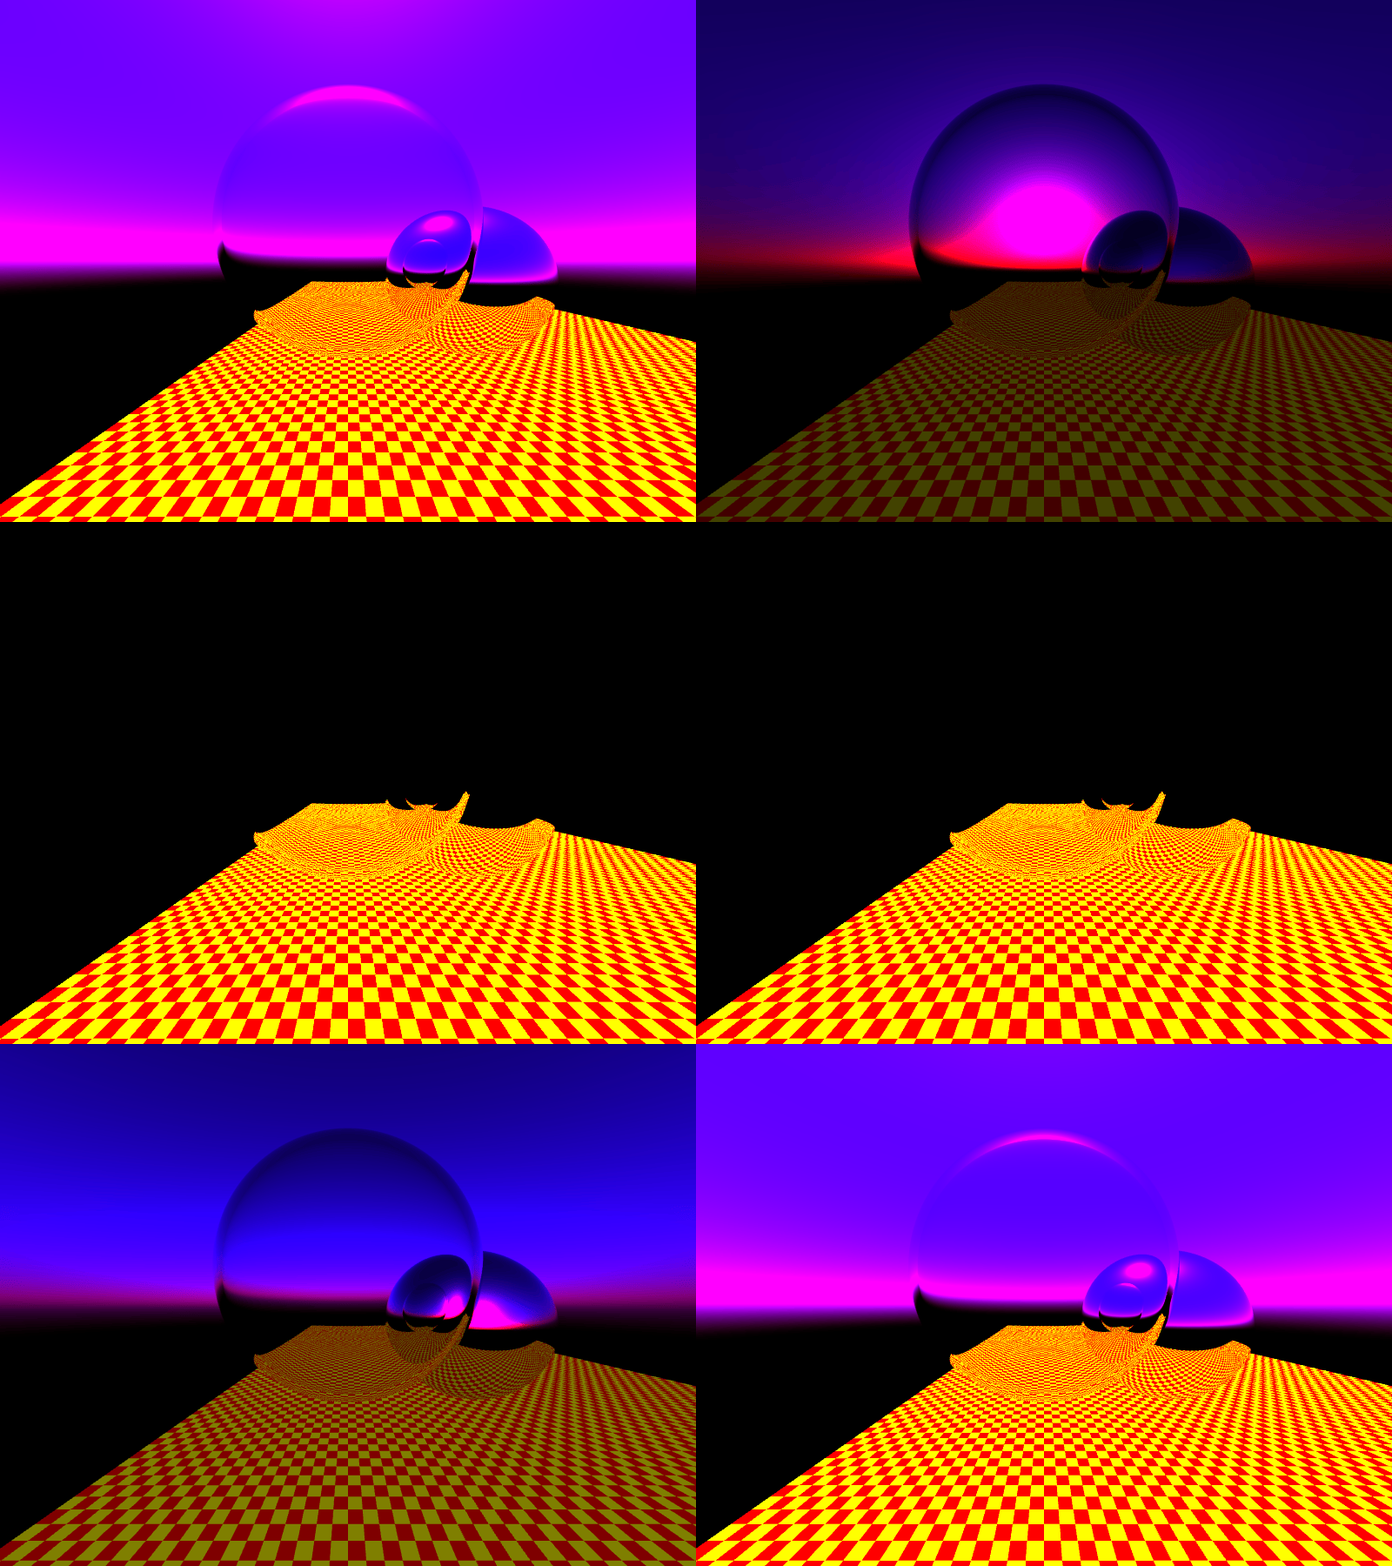
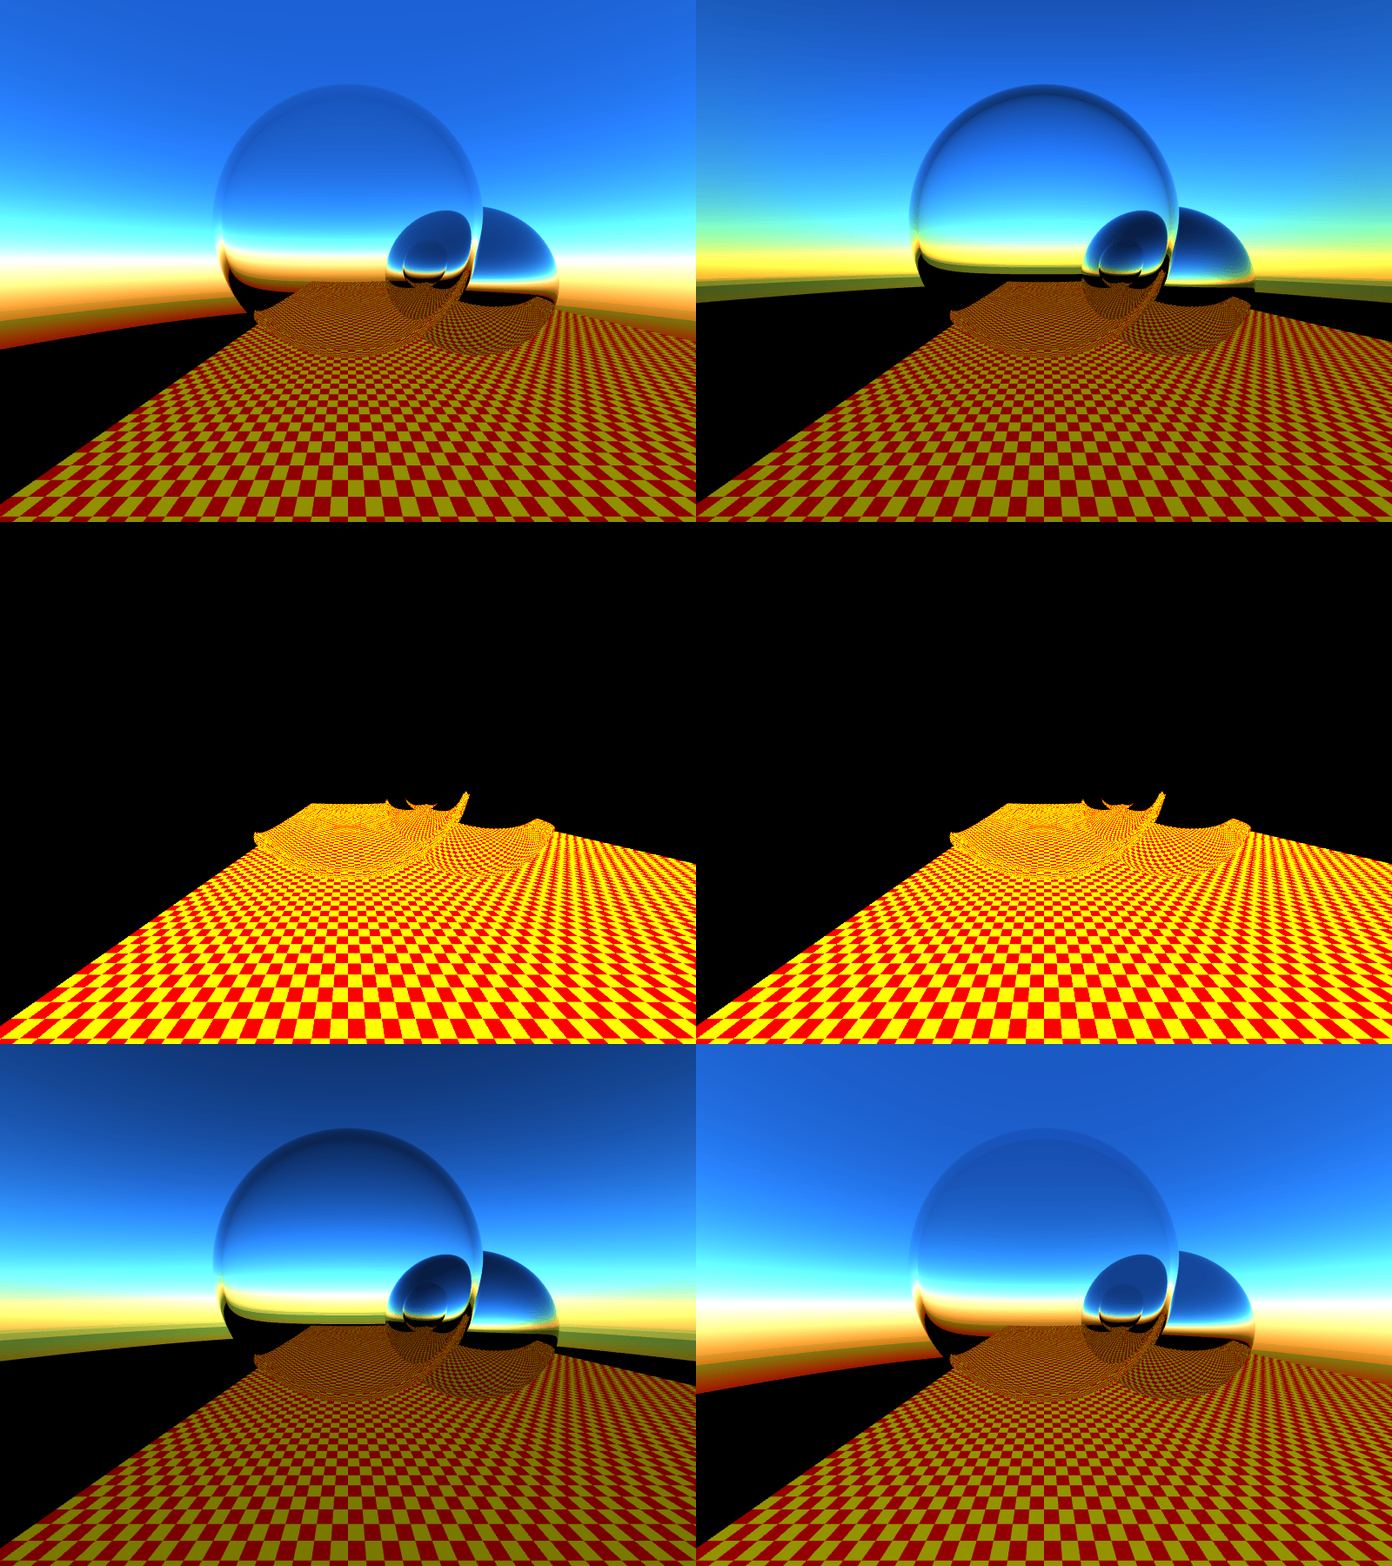
Results of the Realistic Atmospheric Simulation
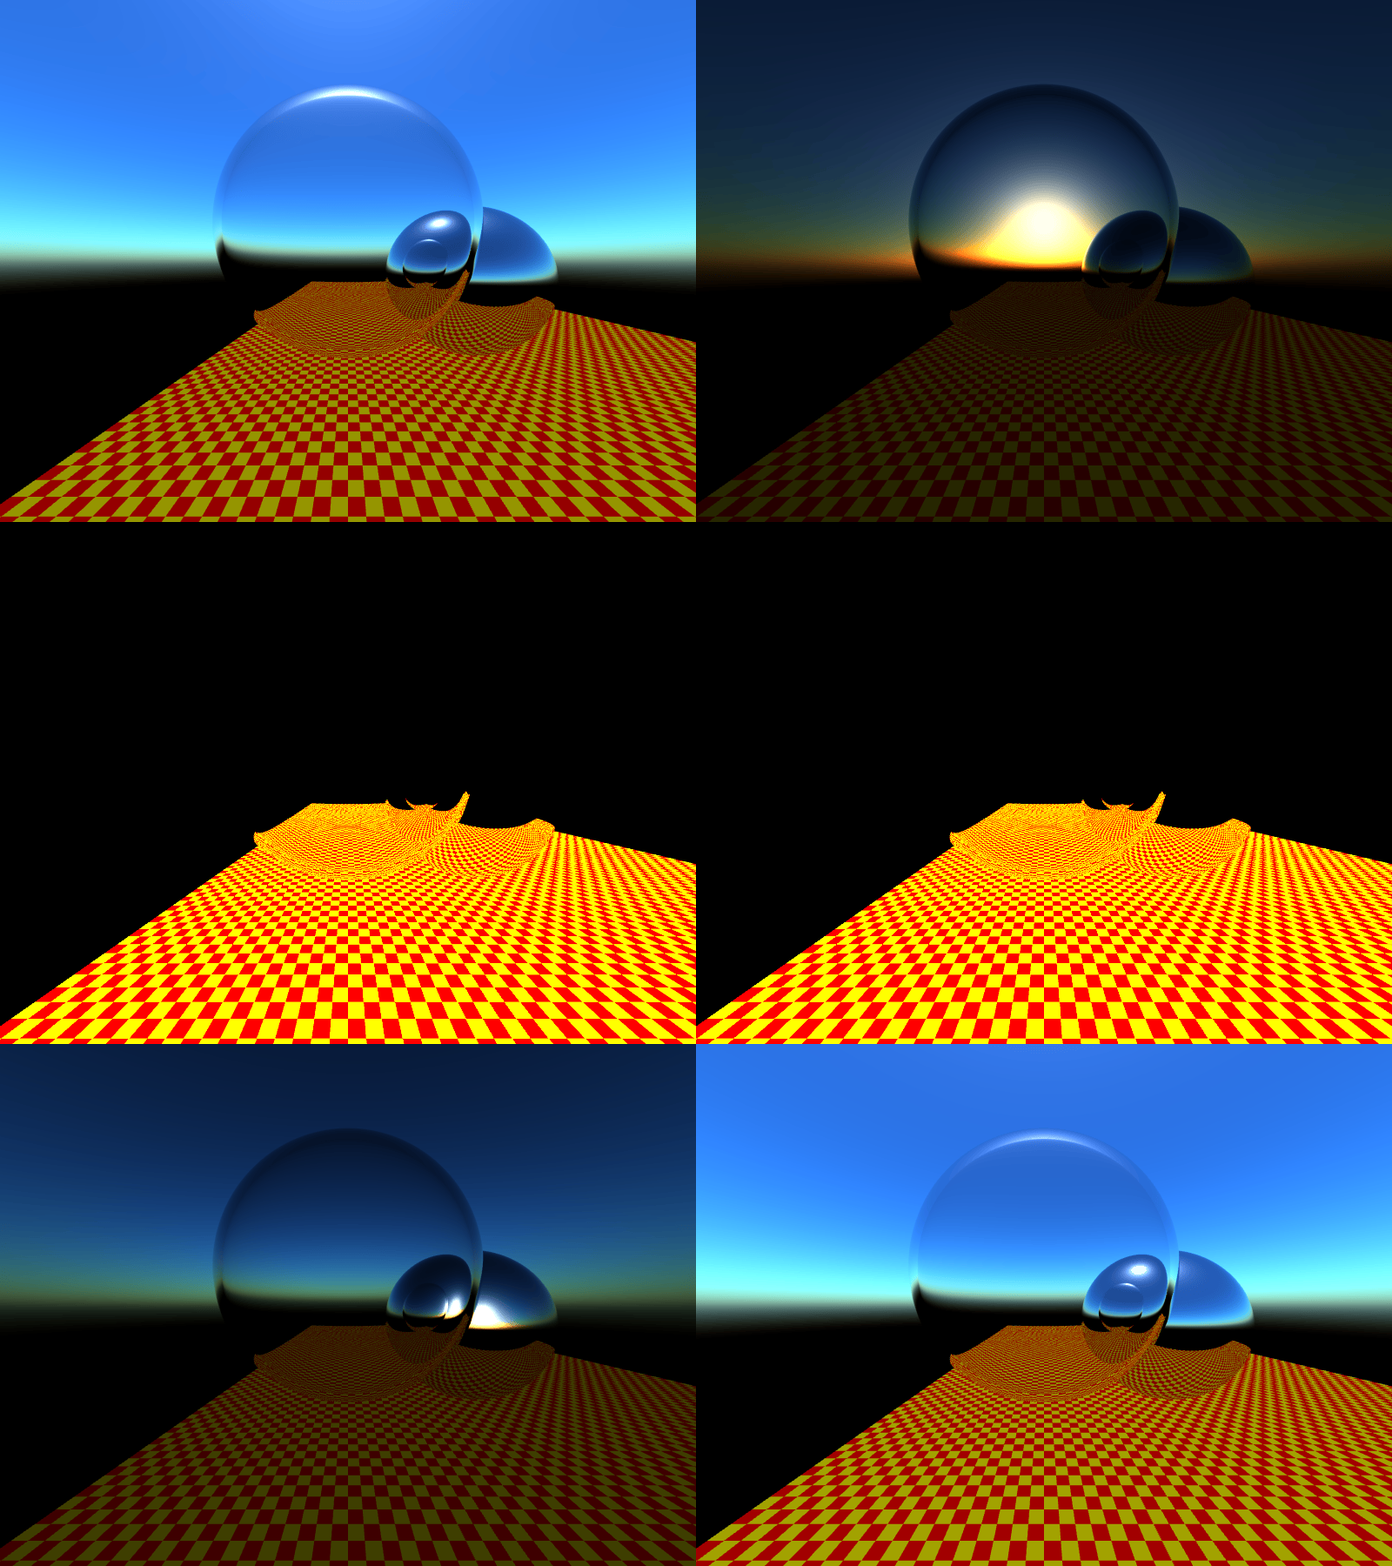
I am really happy with how the final rendering turned out! Since we are trying to mimic reality, I had several physically based variables to tinker with and created a couple of alien skies that could exist with different atmospheres!

Default Settings

Changing the Atmospheric Composition (Rayleigh)

Changing the Atmospheric Composition (Mie)
Future Work
For now my raytracer model is complete, but there are several other ideas I have for the project that I would like to try out;
GPU Acceleration: A chapter from GPU Gems offers a real-time alternative for realistic sky lighting that makes several simplifications to Nishita's original calculations. However, they rasterize their scenes to go onto the GPU, while this model only uses CPU for raytracing. In the future, I would want to be able to move more of these calculations to be GPU before attempting to translate their simplified calculations.
Going to Space: The current model makes the assumption that the camera will always remain within the atmosphere, however that might not always be the case. Several articles already mention viewing from space, and this would be an interesting modification to my model!
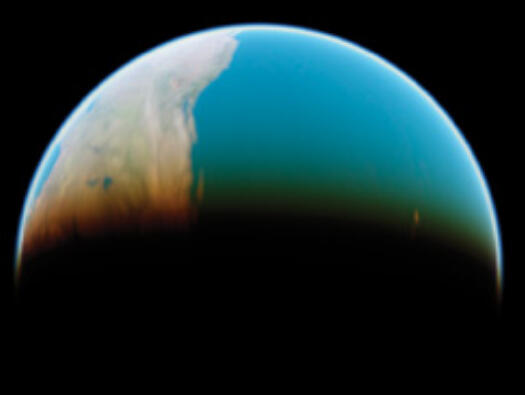
Outside the Atmosphere | GPUGems
Work Cited
Display of The Earth Taking into Account Atmospheric Scattering, Nishita et al., Siggraph 1993.
Nvidia GPUGems Chapter 16
Scratchapixel Simulating the Sky Article
The Raytracer Assignment
CSCI.711.01 Global Illumination Spring 2026
I used this page to keep track of and detail my work on the Raytracer assignment for CSCI 711 Global Illumination. I then built on top of this assignment to later implement my realistic atmospheric model!
Checkpoint 1: Setting the Scene
For the first checkpoint I recreated the locations of the objects in a basic Unity scene to get their relative measurements and positions.
| Object Name | Position | Scale | Range + Intensity |
|---|---|---|---|
| Camera | (-5.0, 3.0 -5.0) | - | - |
| Point Light | (-5.0, 13.0, -4.0) | - | 300 / 100 |
| Platform | (0.0, 0.0, 0.0) | (20.0, 1.0, 100.0) | - |
| Sphere 1 | (-5.0, 4.0, -0.15) | (3.0, 3.0, 3.0) | - |
| Sphere 2 | (-3.0, 3.0, 1.2) | (3.0, 3.0, 3.0) | - |

The Goal: by Whitted, 1980
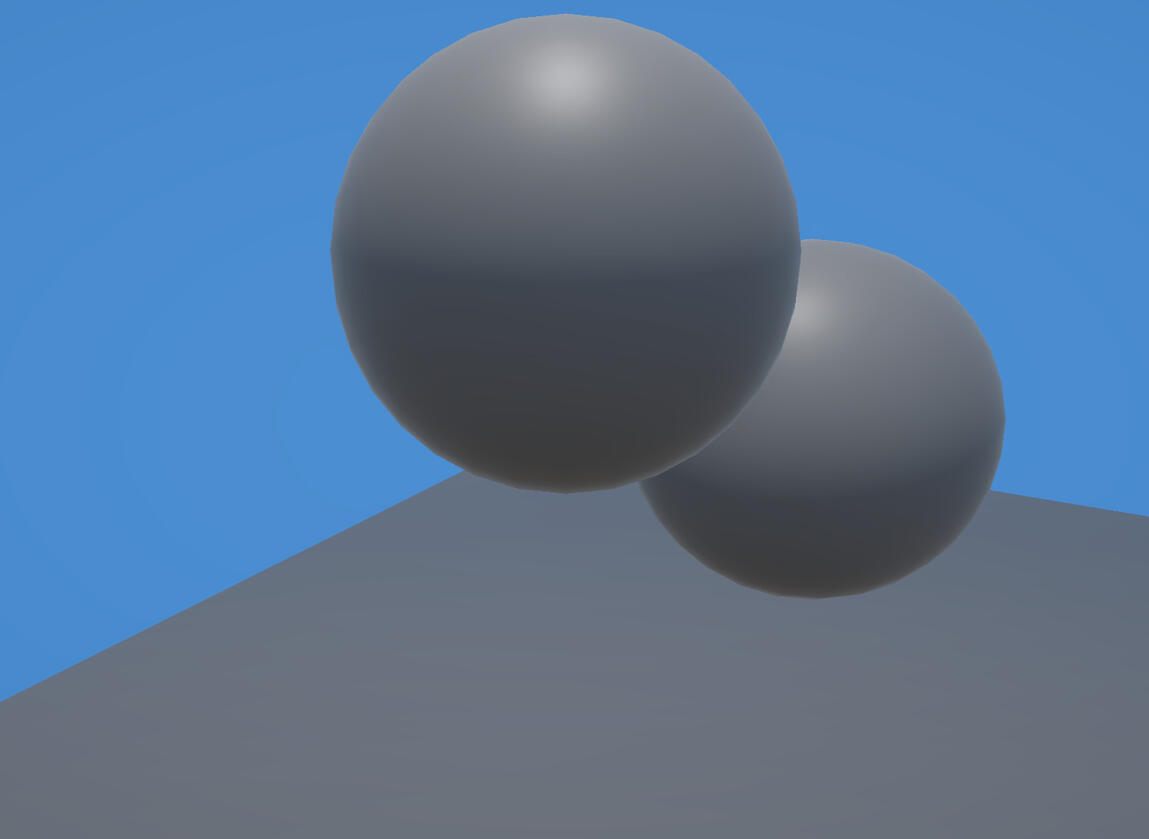
Checkpoint 1: Unity Recreation
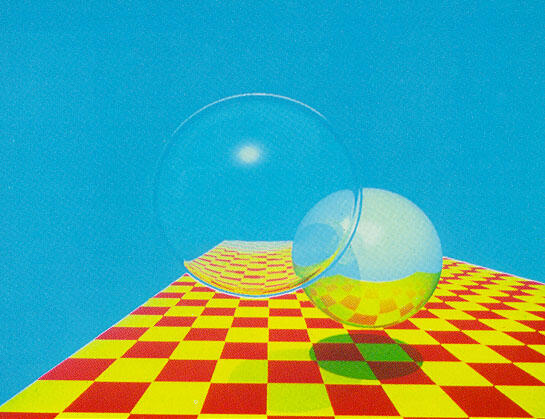
Checkpoint 2: Raytracing Framework
A film plane was implemented from where rays are cast out into a 3D scene, returning the objects that they have hit. I opted to do my pixel calculations in the world coordinate space so that larger models do not have to translate hundreds of thousands of triangles into the camera space. While this made the initial calculation a bit more front heavy, it should save make rendering a the image a bit faster.
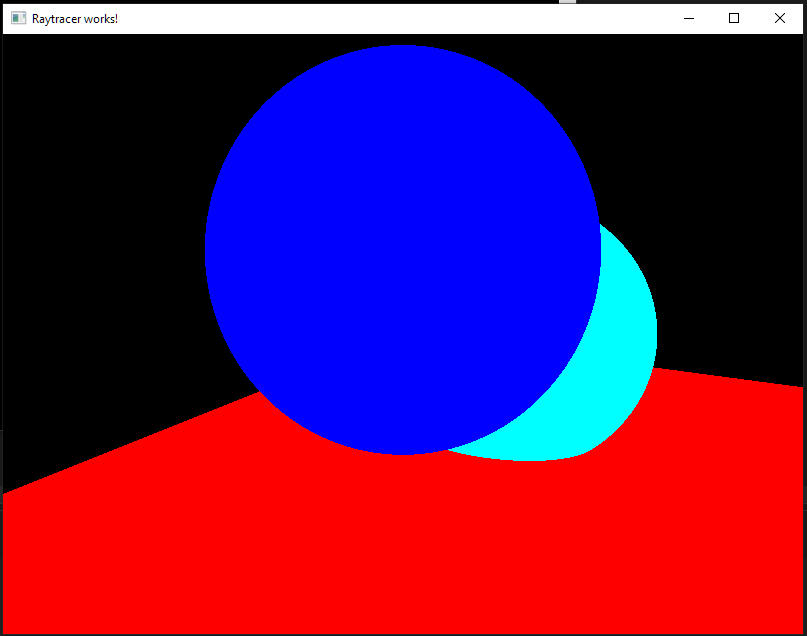
Perspective: Front
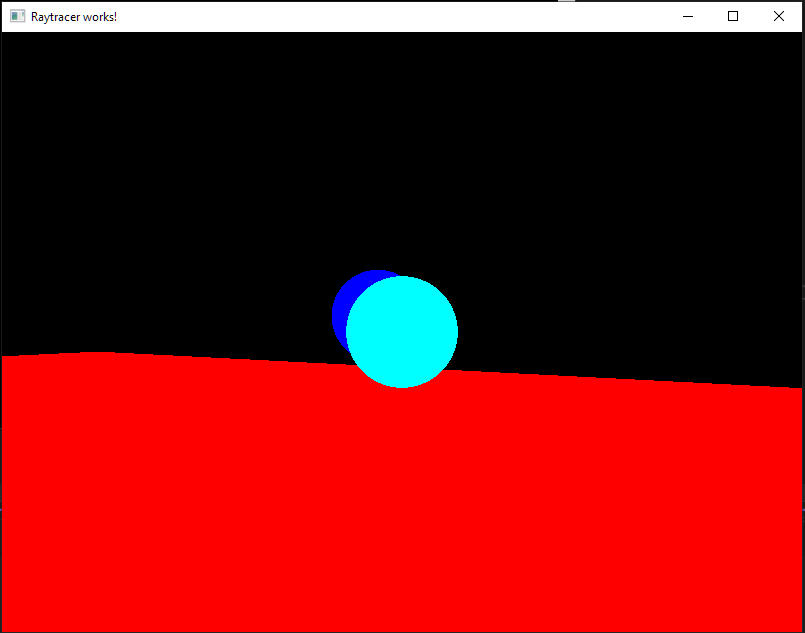
Perspective: Behind
Checkpoint 3: Basic Shading
The basic Phong model simulates a very common illumination model. The base model calculates the irradiance values of each individual ray cast out from the camera, and then performs tone reproduction on the entire film plane.
Current State
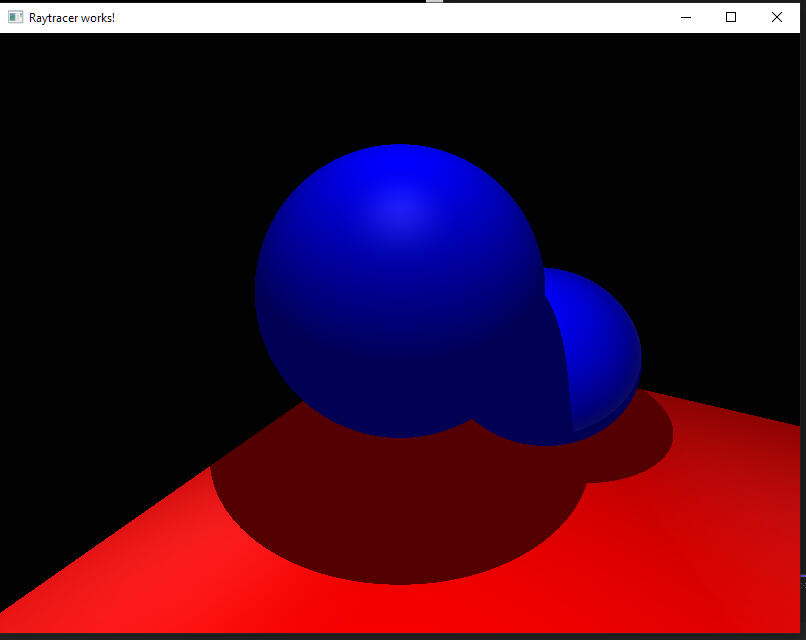
Phong Model
Edge Highlight: The standard Phong model is seeing a strange highlight around the end of the diffuse section on the sphere objects. This is not present during testing the Phong-Blinn model, but I will be keeping an eye on this.
Triangle Edges: The edges between two triangles can sometimes creates a highlight as though they are still separate shapes. I expect this to be a more noticeable issue when rendering objects made up of many triangles, and will address it then.
Extra Additions to the Model
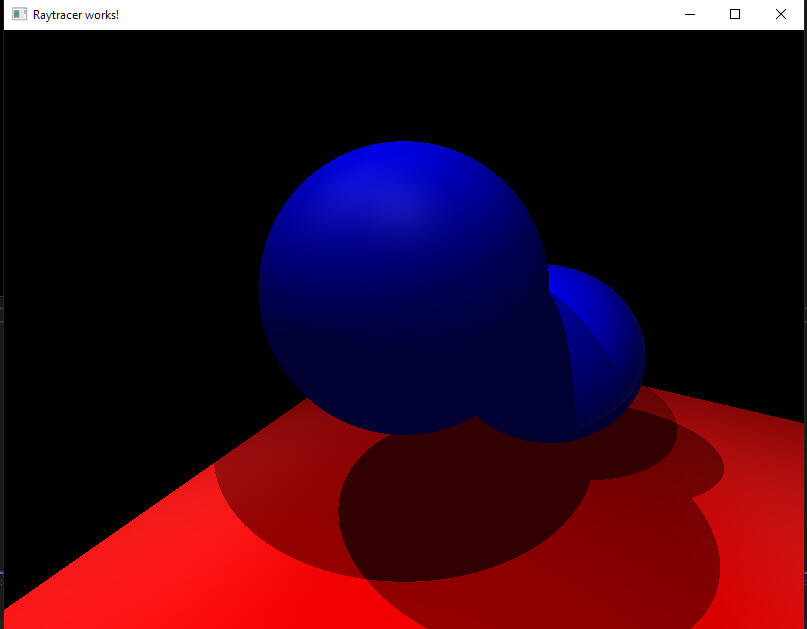
Multiple Lights
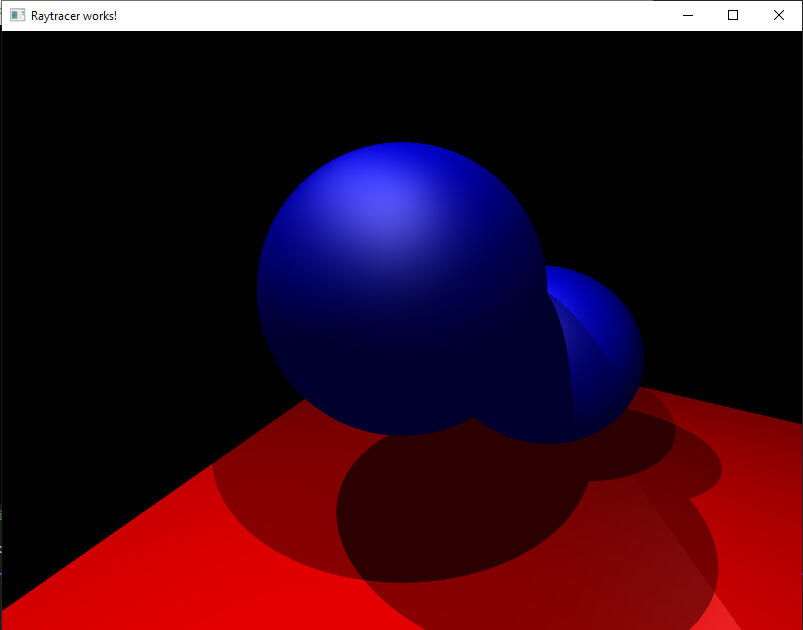
Phong Blinn Model
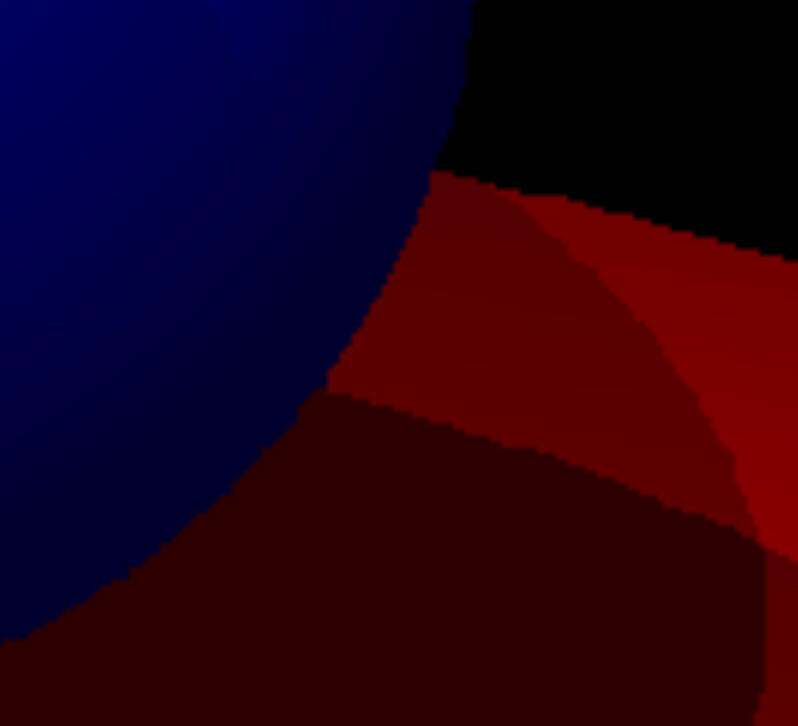
Closeup: No Antialliasing
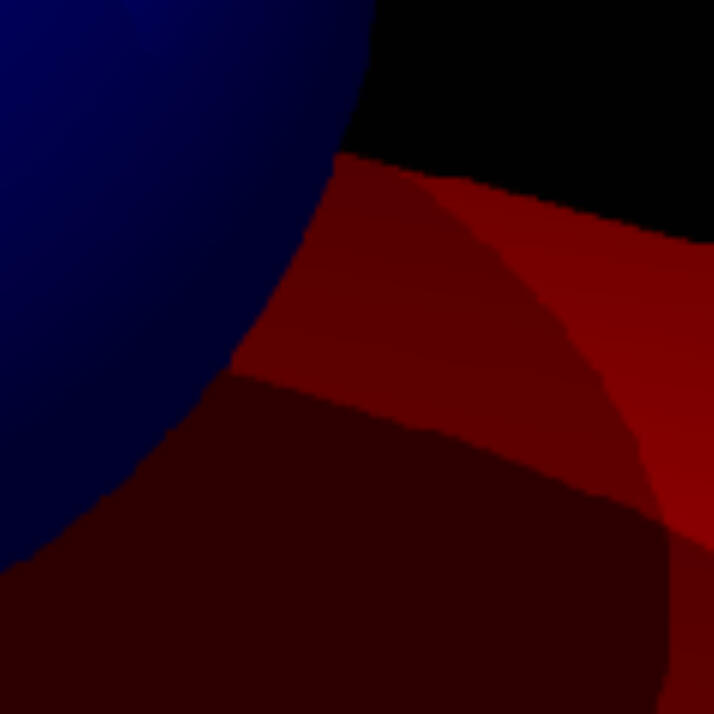
Closeup Antialliasing:
Pseudo RGSS
Multiple Lights: Additional light sources were added to the calculations.
Antialiasing RGSS: Rather than a single ray during rendering, four are sent out to intersect objects, and their irradiance values are averaged for the pixel. To break up the actual curve we are able to detect, the positions of the additional rays were offset in a rotated grid, breaking up any horizontal and vertical effects of artifacts. More samples per pixel improves quality, but some optimizations are needed before we continue to make it worthwhile.
Phong-Blinn: I replaced a costly reflection calculation for the halfway vector.
Rayleigh & Mie Scattering Checkpoint
On top of the raytracer, I chose to implement Rayleigh and Mie scattering to create a more realistic skybox, and improve the accuracy of the lighting model overall.
Theory and the Real World
One Sky, Two Skies. Red Sky, Blue Sky: In the real world, the look of our atmosphere appears blue, red, and yellow based on the distance light has to travel through our atmosphere. The further the distance, the more red and yellow we appear to see.
Our Model: Rayleigh and Mie Scattering attempt to model these lighting affects for different densities of air particles and their relative size by taking several samples of light while moving through the atmosphere.
Light Wavelengths Hitting the Atmosphere | Scratchapixel
Implementation Concept | Scratchapixel
What is next?
Day Cycles and Real-Time The current raytracer is painfully slow. Each of these frames took about 20-30s to render. In order to add day-night cycles I will need to add several optimizations to the raytracer. Nvidia's GPUGems chapter 16 describes several methods and shortcuts to our calculations I plan on making.
Improvements to Tone Mapping: The current raytracer implements very basic tone mapping that is cheap to compute. A future assignment aims to apply a more realistic calculation.
View from Space: Several articles described ways to view these lighting affects from outside the atmosphere, and the image provided GPUGems was particularly effective!
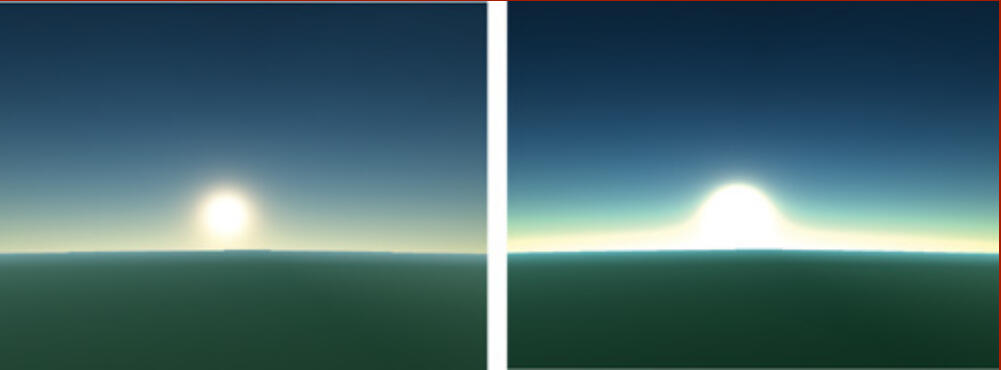
Improving Tone Mapping and HDR | Scratchapixel
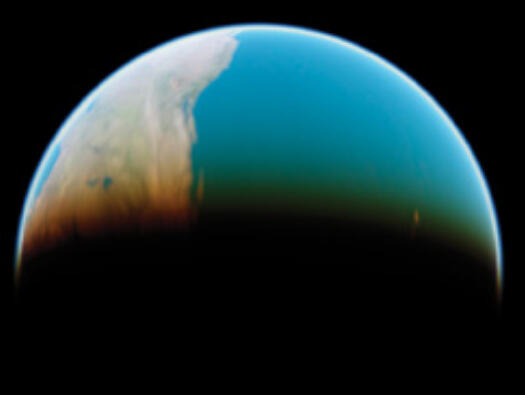
Outside the Atmosphere | GPUGems
Current State of the Raytracer
Initial Render: My first pass with Rayleigh and Mie scattering created good looking horizon! Something in my calculations fails to produce the glow of the sun no matter its position however, which will have to be fixed by the next checkpoint.
Changing our Variables: We can change the look of our skies by changing a few variables. The color of the atmosphere depends on the density and size of the particles in it. The banding and gradient of the horizon is controlled by the size of the planet and the atmosphere around it.

Results of the Raytracer
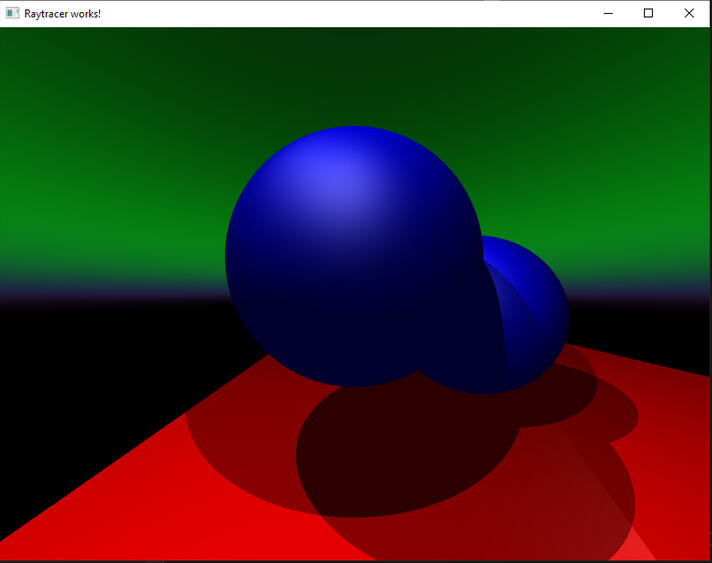
Changing the Atmospheric Composition
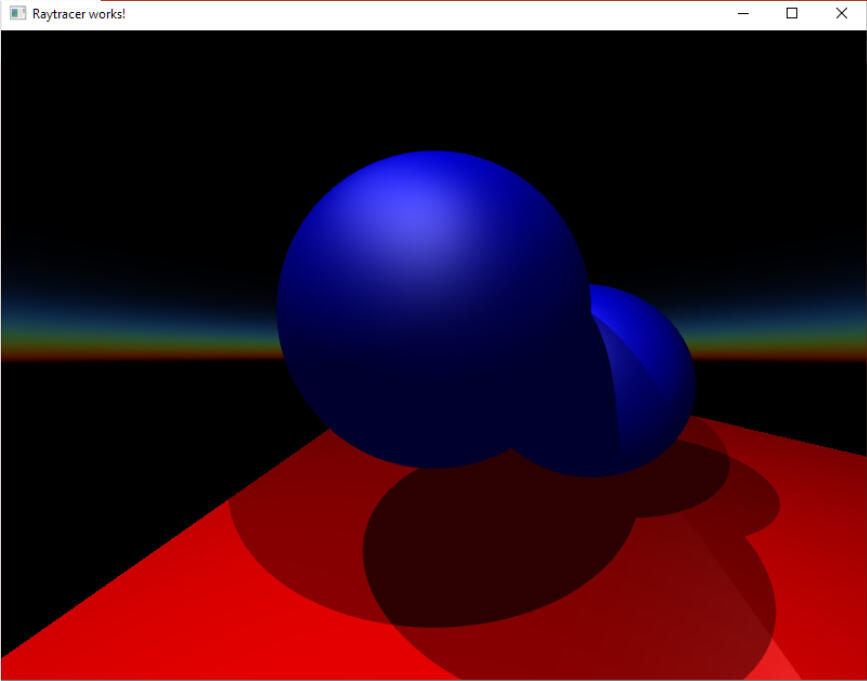
Changing the Size of the Planet and Atmosphere
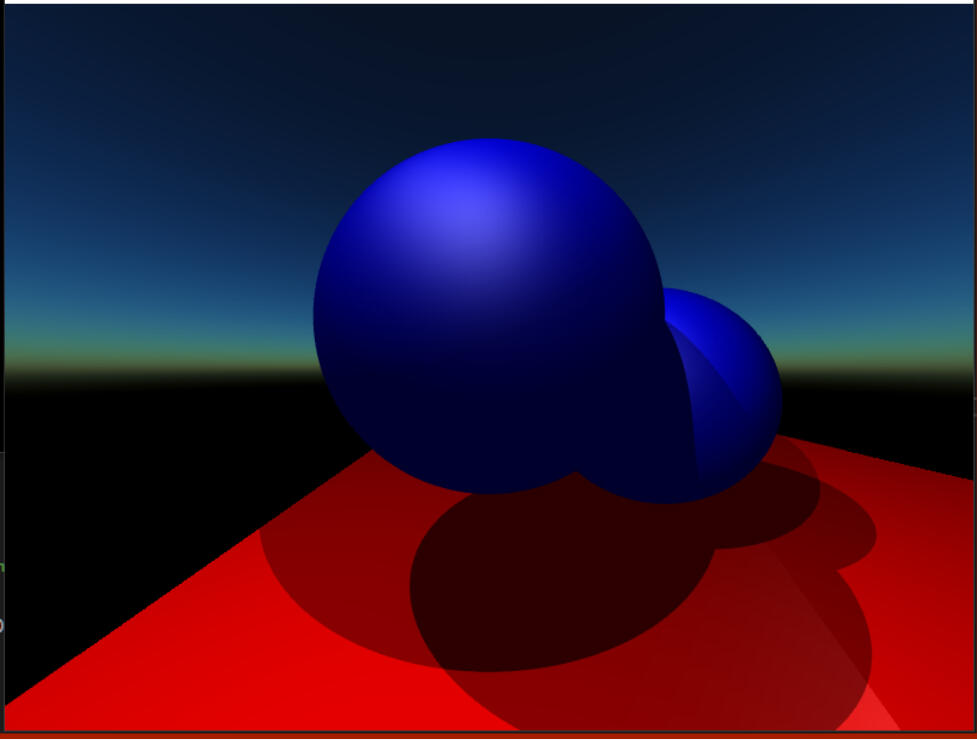
Work Cited
Display of The Earth Taking into Account Atmospheric Scattering, Nishita et al., Siggraph 1993.
Nvidia GPUGems Chapter 16
Scratchapixel Simulating the Sky Article
Checkpoint 4: Procedural Textures
Finally replacing our original matte color values with some actual textures, I implemented a material class that can be stored by the object class. Below are some example procedural textures I experimented with, but the next step will be to load in actual texture map files.

Checkerboards Texture
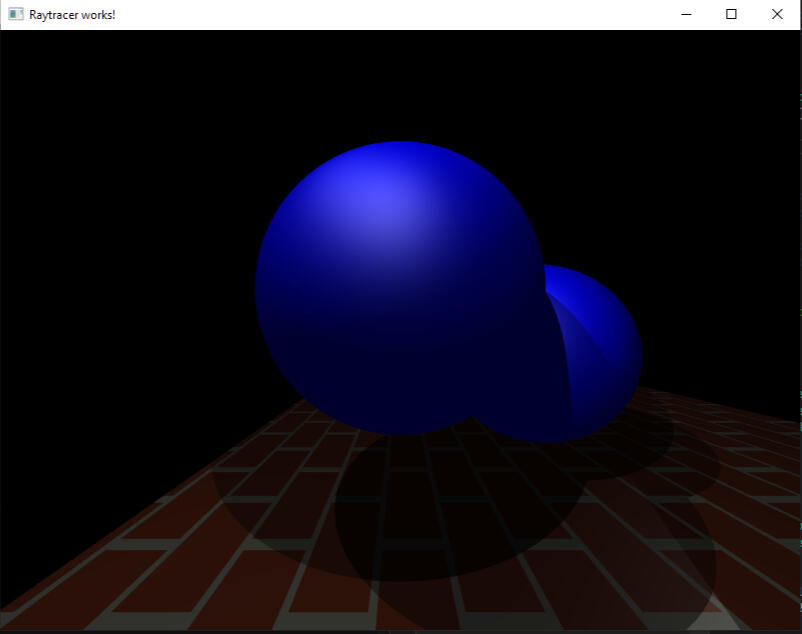
Brick Texture
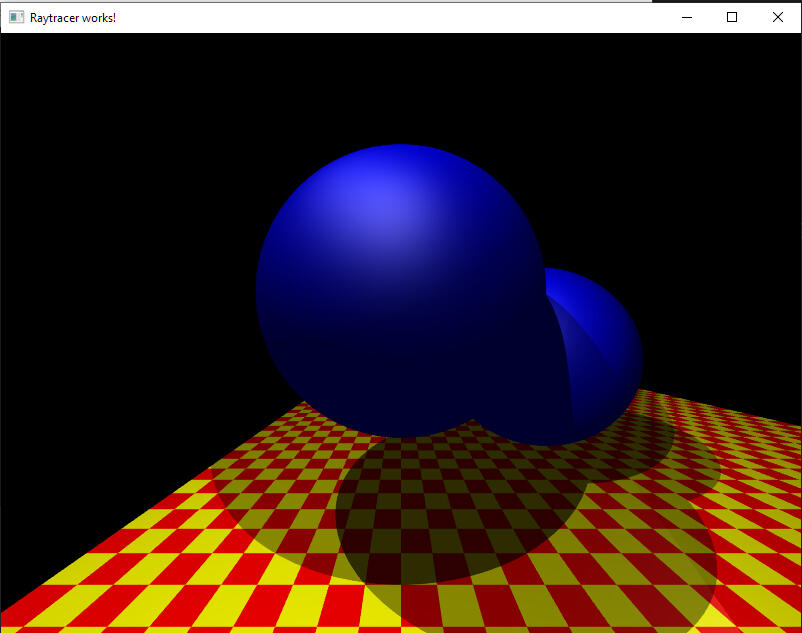
Checkpoint 5: Reflection
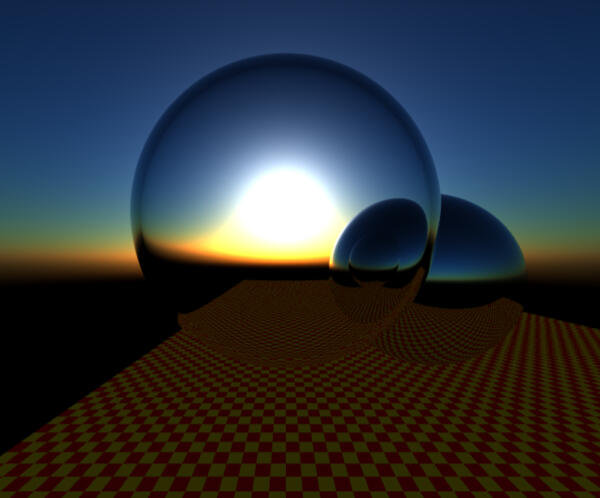
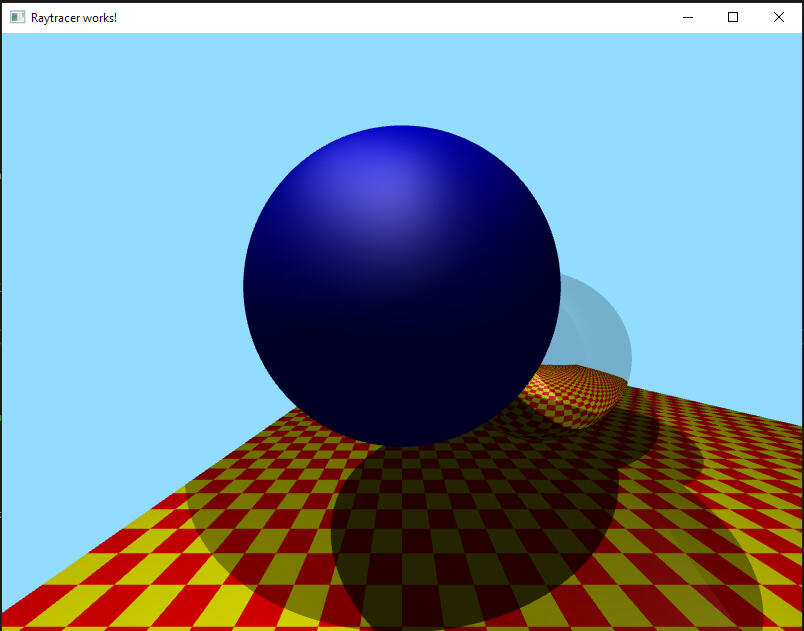
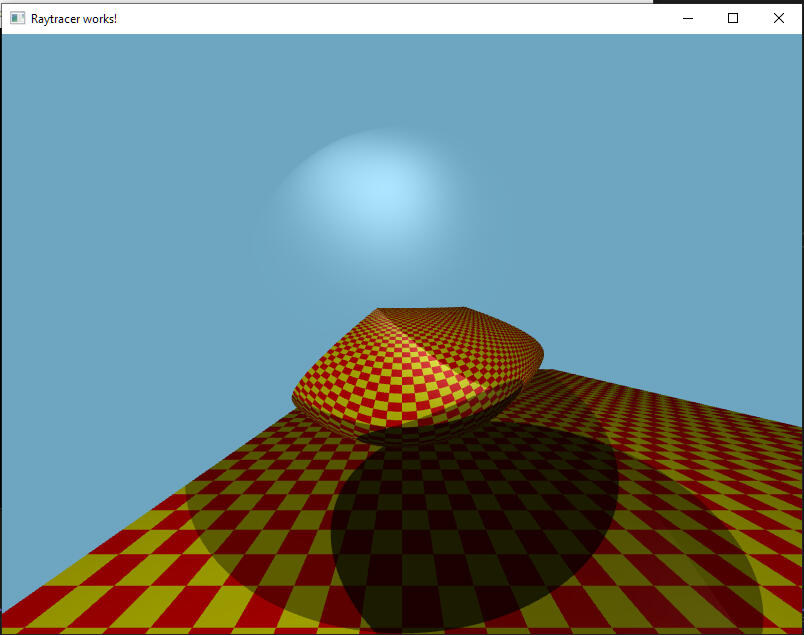
Nearing the finish line, we add reflections to our simulation. By recursively sending out rays, we can simulate reflective surfaces on one of the spheres. This recreates Whitted's original too perfect reflections. The change in the brightness of the scene in the second image is a tone reproduction issue, and will be fixed later on.

Whitted Perfect Reflections

Better View of Specular Highlight
Checkpoint 6: Transmission
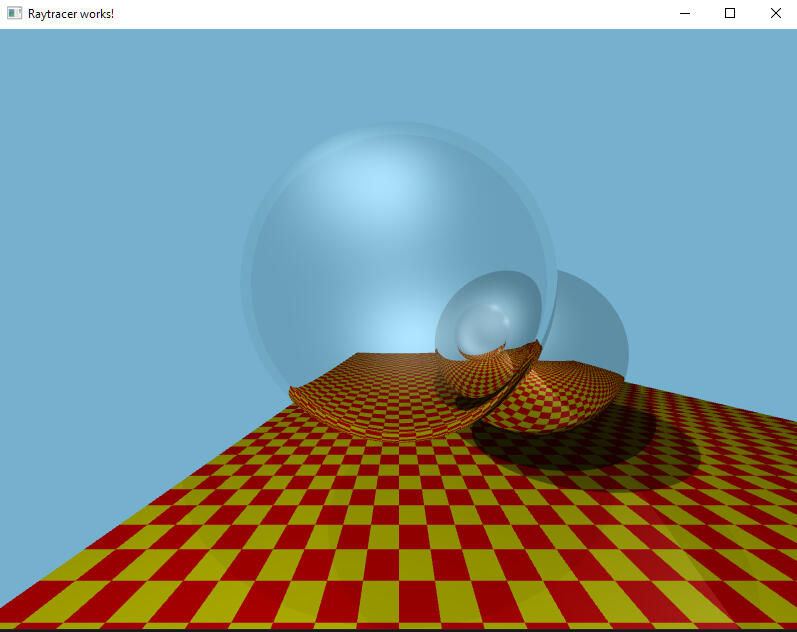
We finally have the last material for our recreation of Whitted's original raytraced model! Light rays can move be refracted through transmissive objects, and around the edges total internal reflection occurs.

Whitted Transmissive Effect
Checkpoint 7: Tone Reproduction
Tone Reproduction! The finishing touches to our recreation of the Whitted scene scales the color values of the scene to something slightly more realistic.

Low

Medium

High
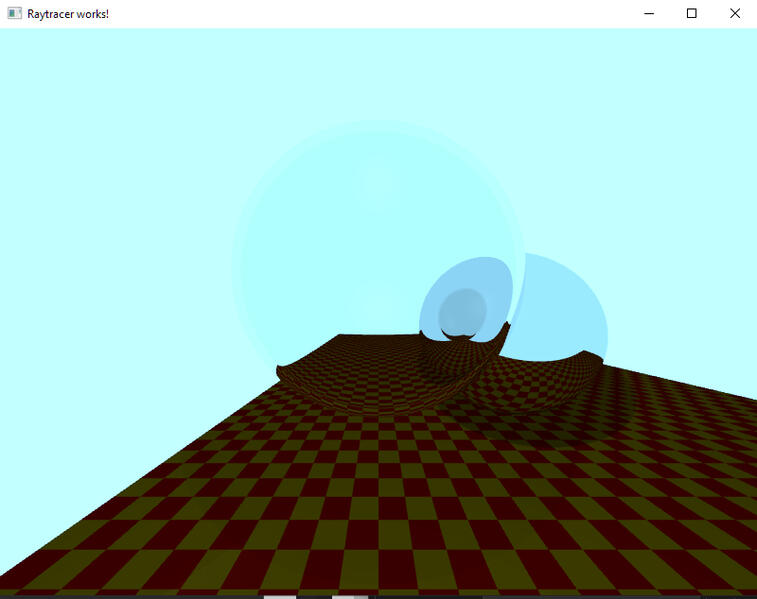
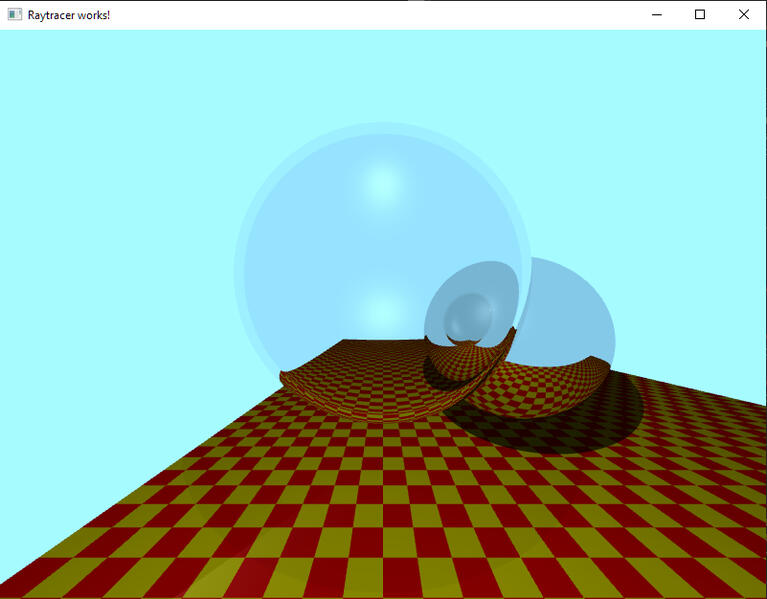
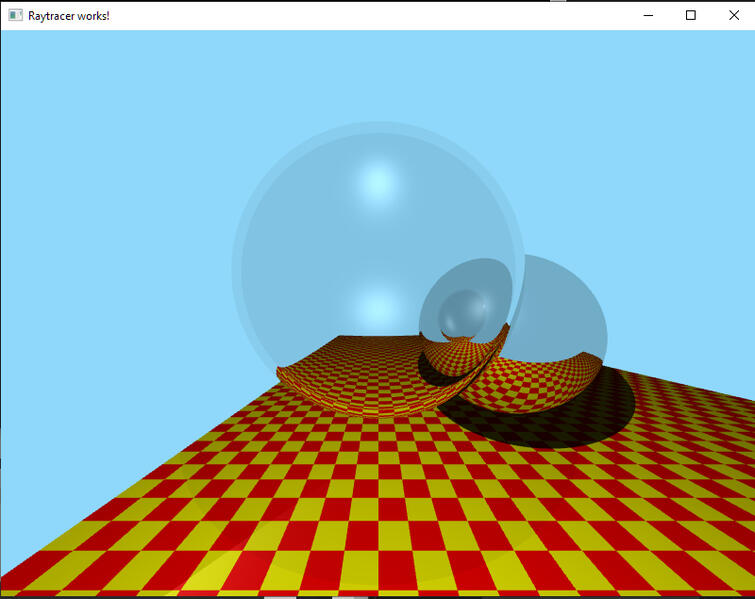
Ward's TR Operator: This one came out really nice. As the lighting in the scene increases, the background skybox becomes less bright and puts more focus on the scene itself!
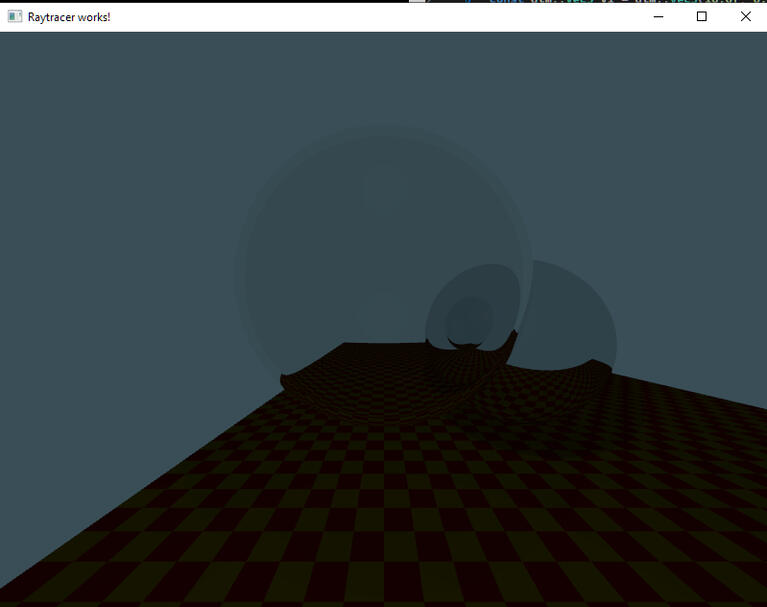
Low

Medium

High
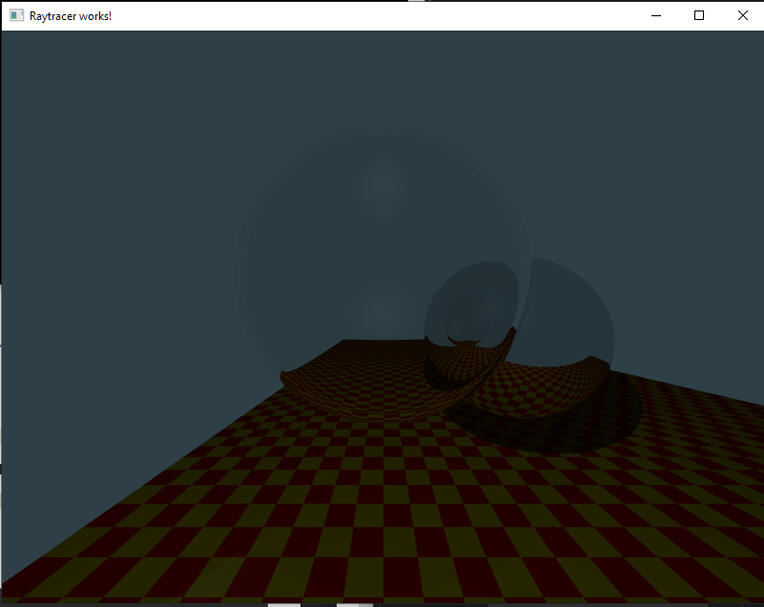
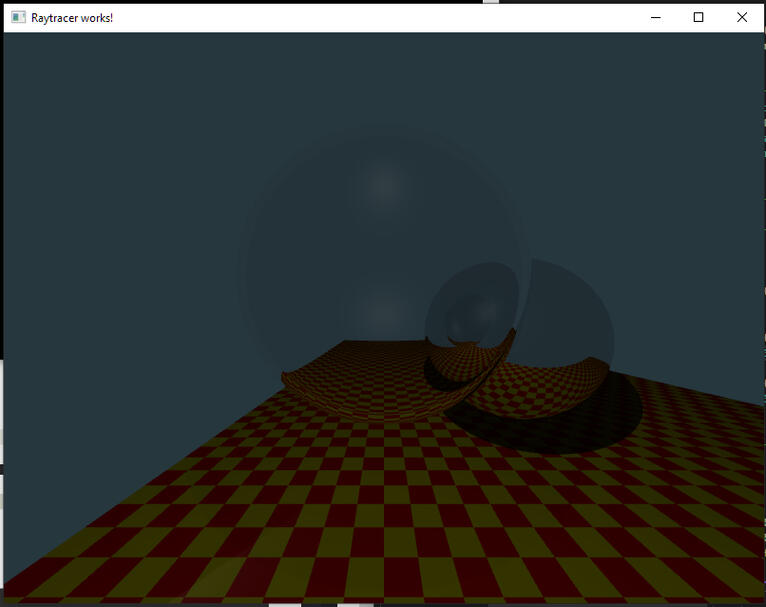
Reinhard TR Operator: I had more difficulty with Reinhard's implementation. I've included the same images using the same illuminance values as in the Ward images, however I was unable to get the background to distinguish itself as much from the foreground.
Advanced Tone Mapping
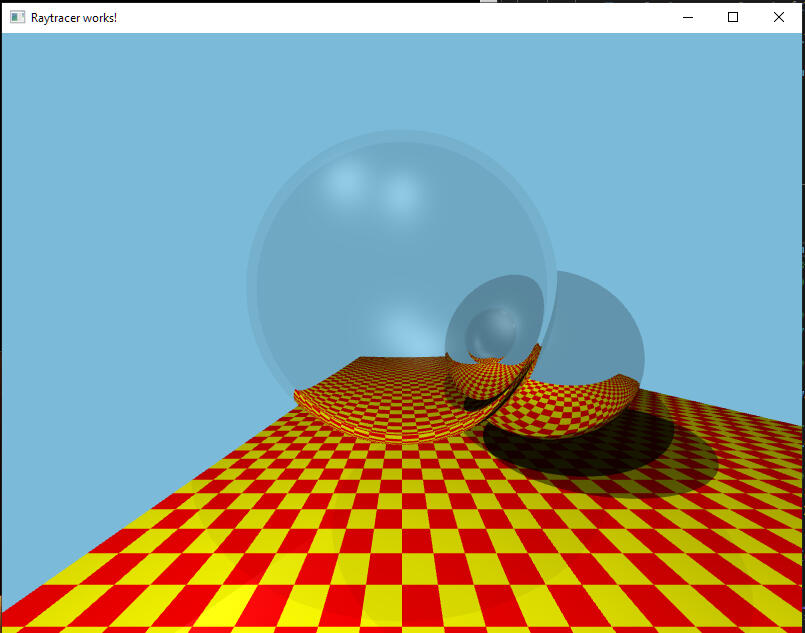
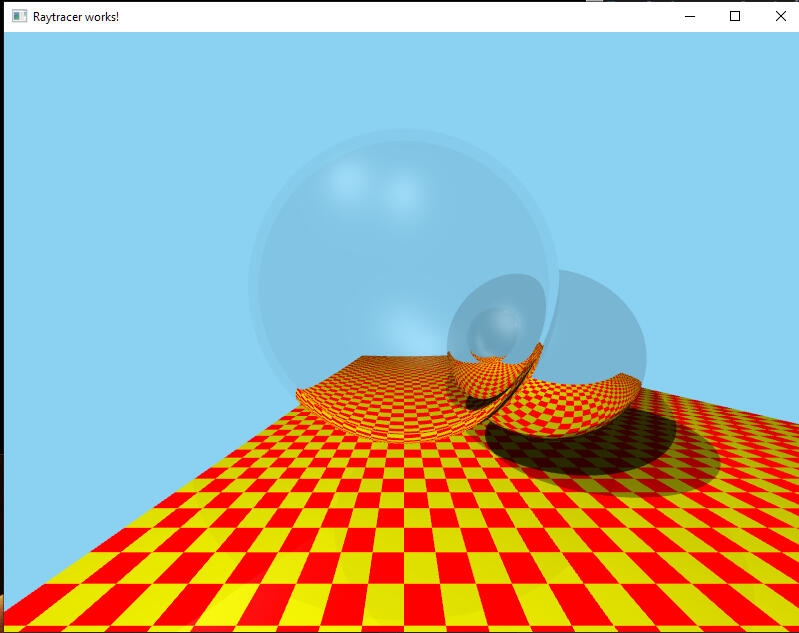
Going somewhat further with the Tone Reproduction from the last checkpoint, I implemented another tone operator called Adaptive Logarithmic Mapping. In these scenes the changes are slight, but it takes into account the luminance at each individual pixel, making for a more balanced scene.

Ward Tone Reproduction

Adaptive Log Mapping
Advanced Procedural Texture
Going a step further from my previous textures, I replicated a section of the tile pattern from my local cafeteria. The tiles themselves link in such a way that prevent a repeating section from forming, so I based the texture on one closed off section marked by the black square-space.

Procedural Tile Recreation
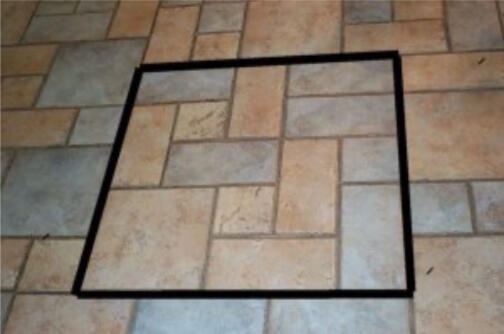
Target Tile to Recreate
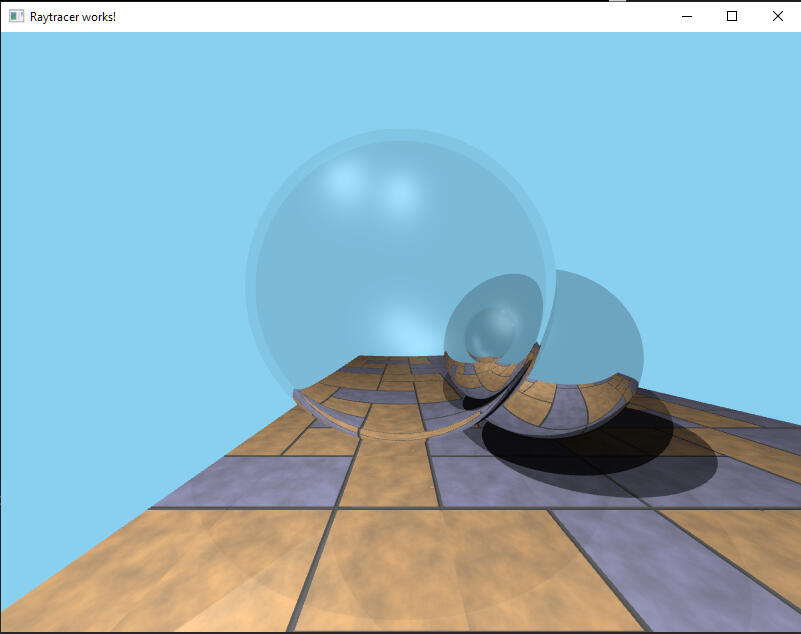
Possible Improvements to the Texture
Randomizing Color Value: While I replicated the exact colored tiles within the black square-space, the other tiles appear to be completely random. While I chose this simpler method, I could reference a random seed at those uv coordinates to get the same color for that tile independently at each raycast, and make the tile-color actually random.
Layered Noise: I am currently using a Fractal Brownian Motion to mimick the tile discoloration. This works for the lighter sections of the tile, however I could also add a more root-like brown noise pattern on top. More brownish dot like noise would also improve the effect.